26 May – 5 June, 2025 — Donita Kadharusman
Games Art Pipeline 24/25
3D — Low Poly Game Char, Week 6-7
Texturing
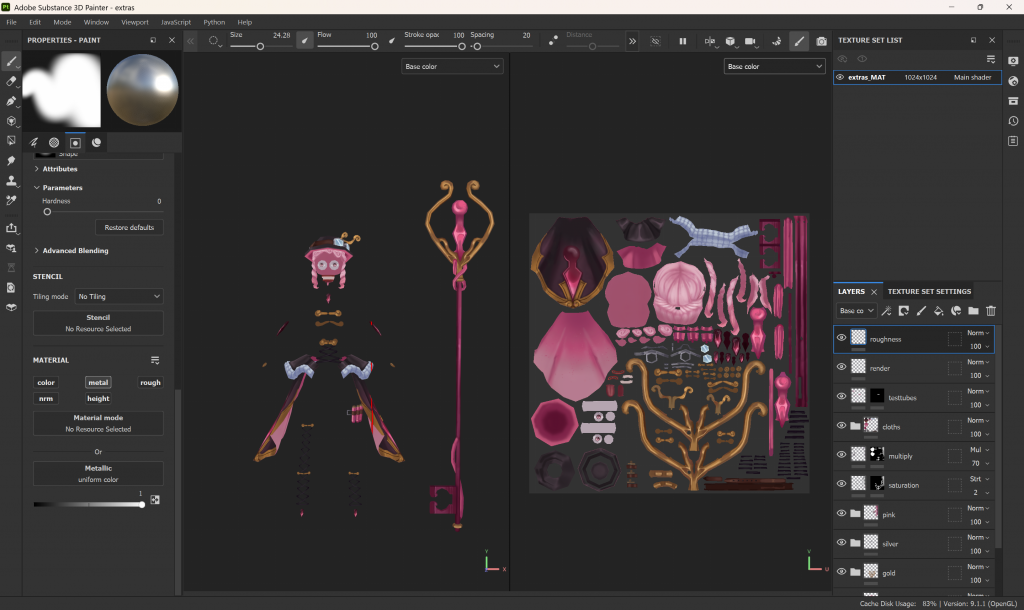
I had some overlapping UV’s as the dangling cloth were duplicated and mirrored only, hence enabling for better quality for other assets within the UV map. While texturing, I ran into an issue where the cursor would constantly jump from one point to another and I noticed that it only happened when I was painting the overlapping UV’s. I believe Substance couldn’t understand overlapping UV’s, just like what Amil said that you’d notice errors in Substance if there are overlaps. To solve this problem, I used masks so I could only paint those certain parts, hence it wouldn’t accidentally paint the other.
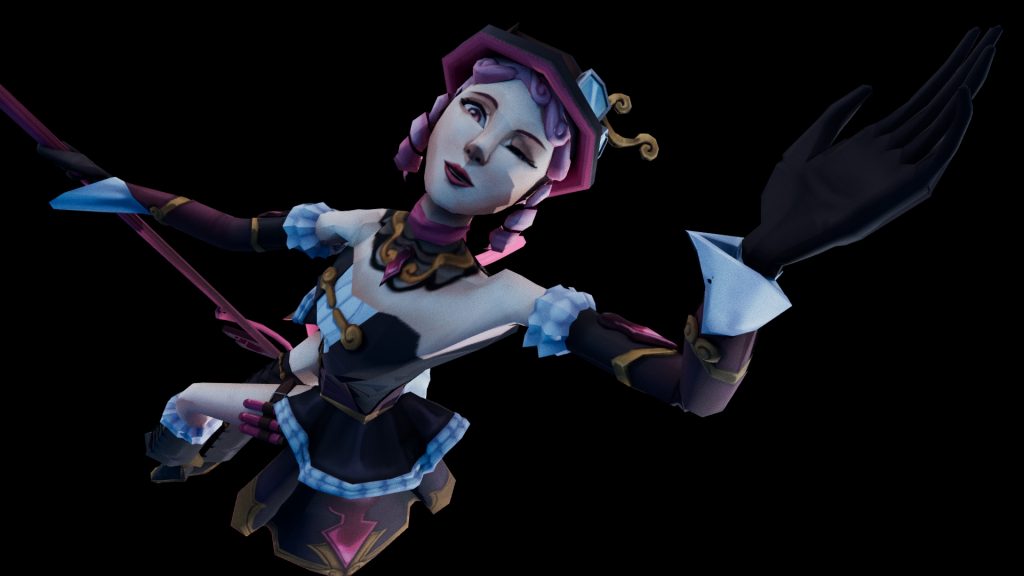
I avoided using any type of material like metal or minimal roughness to mimic League of Legends (2009) purely hand painted style and adding a little bit of emission to create glow effects on the staff’s pink bow to create a sense of danger from the chemicals, then at the end of the scarf and the inner side of the long dangling cloth to further highlight the main accent colour: pink.
Rigging
I am grateful and honoured to have my model rigged and weight painted as a demonstration in class. However, I redid these steps myself as this is an opportunity to learn and experiment especially when it’s my first time rigging and weight painting.
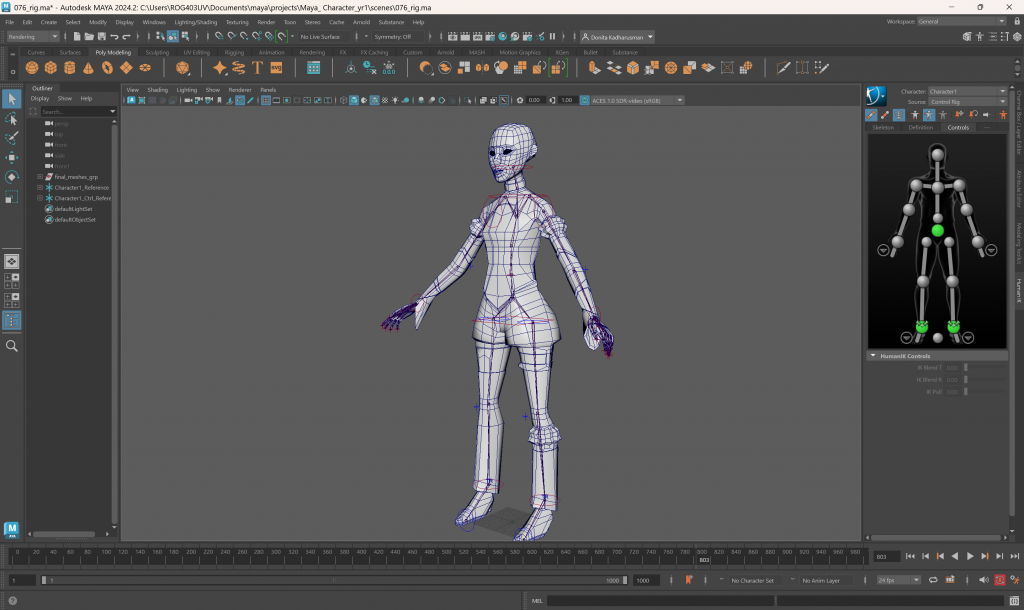
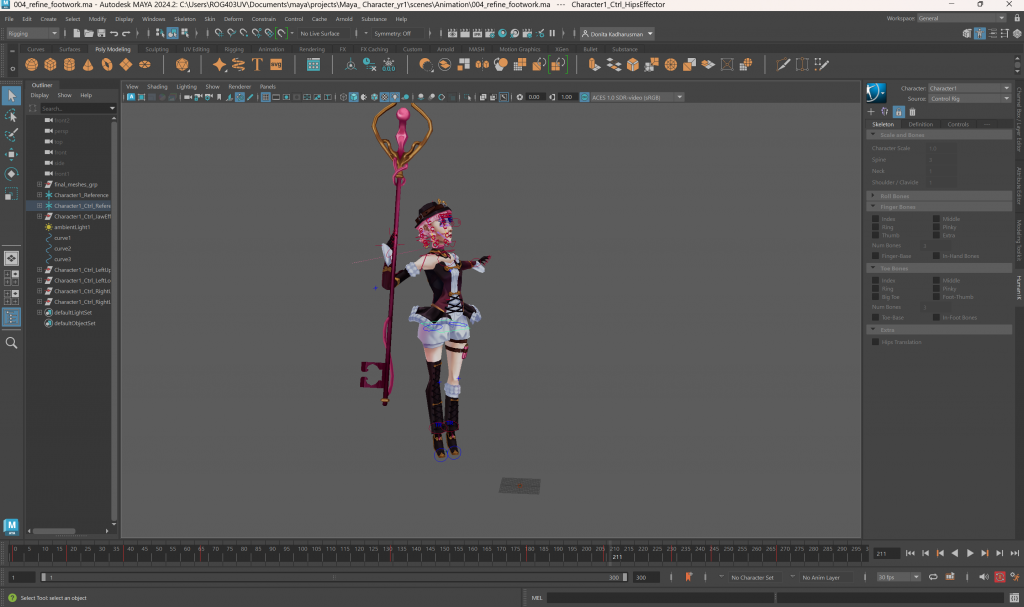
From this tutorial, we learnt that the basic of creating a moving model is by rigging, basically adding skeletons / joints to the character. As a beginner and time constraint, we used an tool that’s already in Maya to generate the full human base skeleton and controllers using IKskeleton. From then, we only needed to align these joints to the character perfectly. To make it easier, I only aligned these joints on the left side of the character then mirrored it. If the model is perfectly in the middle and mirrored, these mirrored joints will automatically set in position on the right side. I learnt this from YC’s experience, because her mirrored joints didn’t align on her model’s right hand, hence it could trouble later in weight painting and even moving the fingers. Because I wanted to experiment more on this process, I continued to rig the face, such as the lower jaw, eyes movement, eyelids, eyebrows, and hair.
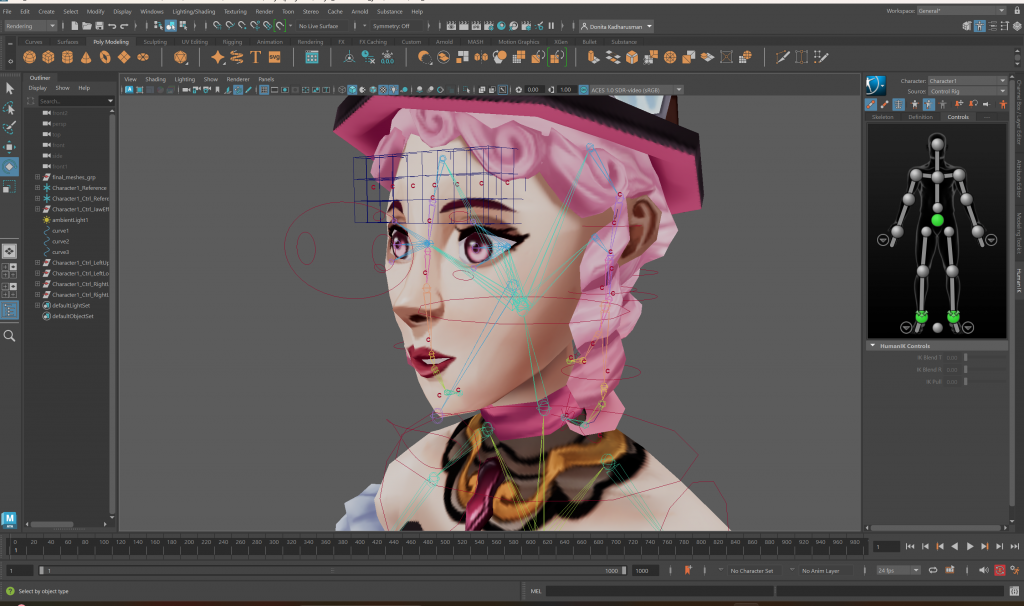
I followed Amil’s tutorial on rigging a basic open jaw simulation by creating a joint to the lower jaw of the mesh that’s connected / parented to the head joint. Then creating a NURBS to create the controller that’s placed in front of the jaw joint end then putting the gizmo at the start of the jaw joint so when it rotates, the jaw opens and rotates downward nicely. Then creating a null group (group with nothing selected / just an empty group that plays a role as a controller of what’s constrained / inside the group) with its gizmo at the start of the jaw joint as well, before parent constraint the jaw joint to the group so it moves nicely downward. Then parent constraint the NURBS / jaw controller to the null group so it moves downward as well before connecting this NURBS to the head controller by middle click and drag the NURBS on the outliner to the head controller (basically parenting the jaw controller to the head controller so when the head controller moves, the jaw moves as well). And most importantly, always delete history and freeze transform the Null group and NURBS / controller (also meshes that have not been bound) whenever they’re in the right position, because these newly added elements are not connected to the IKskeleton which can be reseted to the default position with a button. Delete history and freeze transform can only be done on the controller section not joints / meshes that are already bound because it will break the rig. With this newly method, I could create a simple blinking simulation with the same method by applying to the upper and lower eye lids.
To simulate eye movement, I followed Amil’s tutorial again from the other group’s recording and all you need to do is create a NURB controller in front of each eyes then select the one eye to the controller on front and aim constraint it. This made the eyes aim for the controllers where ever they move. Then created a bigger NURBS which parents both smaller NURBS so both eyes easily follow them without getting crossed-eyes. Lastly, parenting the eyes controller to the head controller again.
Afterward, I tried to push even further for eyebrow rigging by following SARKAMARI YouTube tutorial, ‘Maya Facial Rigging 03: Skin Deformers’ (2021). Because I do not have eyebrows on a separate mesh, I can simply use a deformer that he used to deform the facial structure surrounding the eyebrows, but the twist is that I use it to fully manipulate the eyebrows movements. By selecting the vertexes surrounding the brows and applying lattice, it creates a boundaries to be deformed on the selected vertexes. Then creating clusters for the lattice for easier deformation group (clusters are basically grouping the controller so you wont need to select each controllers and manually adjust it). I created clusters for each part of the brows: middle of the forehead, brows next to the forehead, the middle brow, and the farthest brows. To make these deformers move along the head, I parented the lattice to the head joint, while the clusters to the controller as it serves as controllers rather than joints.
Lastly, I followed Michael Banks’ ‘Maya 2020 TAIL RIG tutorial’ (2020) video on YouTube to create the hair, as stylised hair moves similarly like a tail. First, I created the joints following along the dangling hair and connect it to the head joint, then select the second joints to last hair joints (cause the first hair joints do not move, as it holds the remaining dangling hair to the main hair base) and create IK Spline Handle to create bendy material. By that, it created a curve and then I could select these vertexes and assign clusters, then put NURBS controller from the second cluster (to the root) to the last one before parenting the clusters to the NURBS controller so it moves along with the NURBS. Then parent constraint each clusters to the one before it, then parent the first cluster to the head controller and parent all the NURBS all together to the head controller.
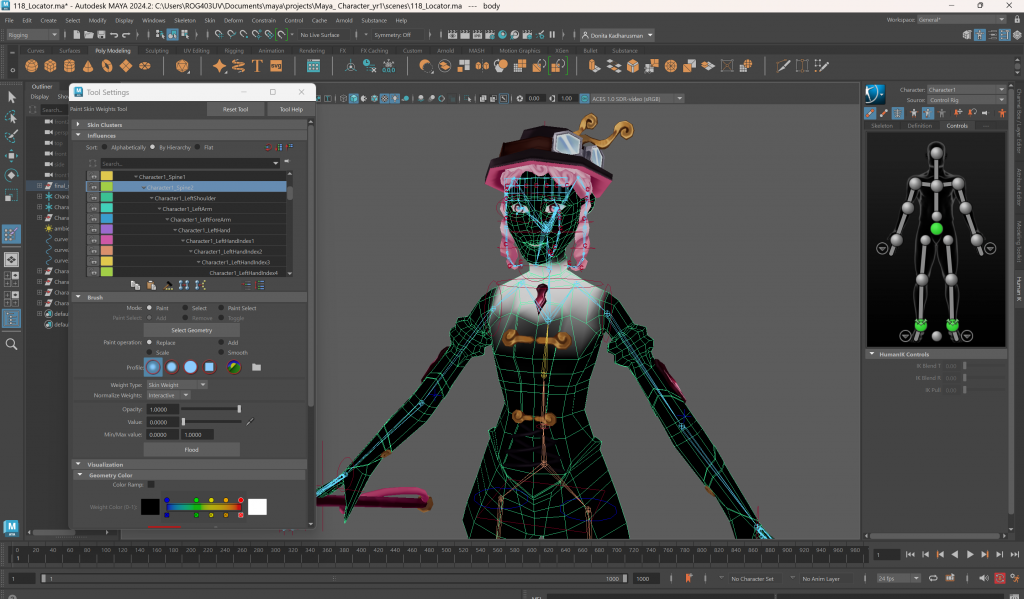
Weight Painting
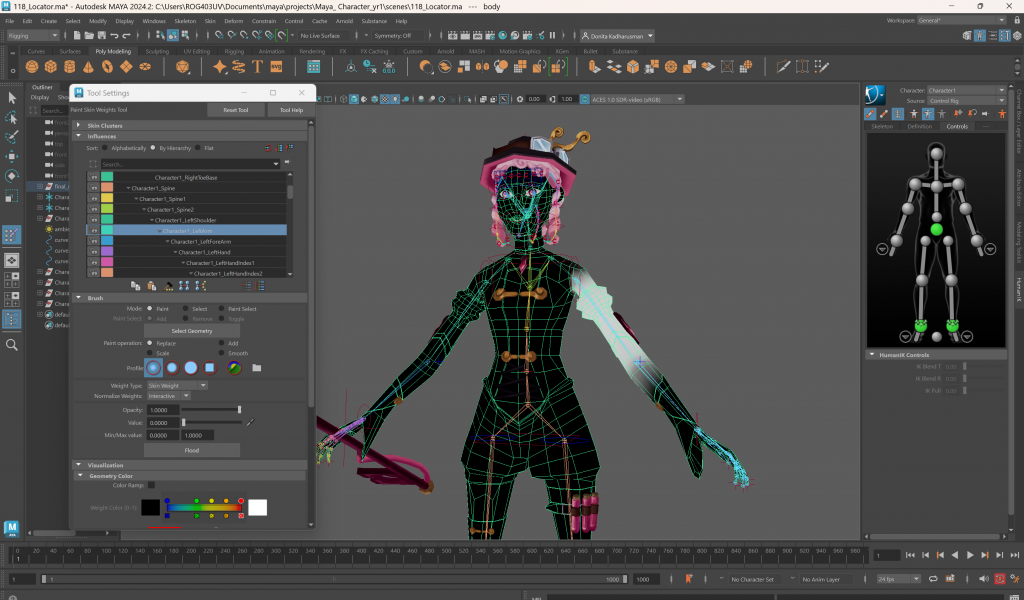
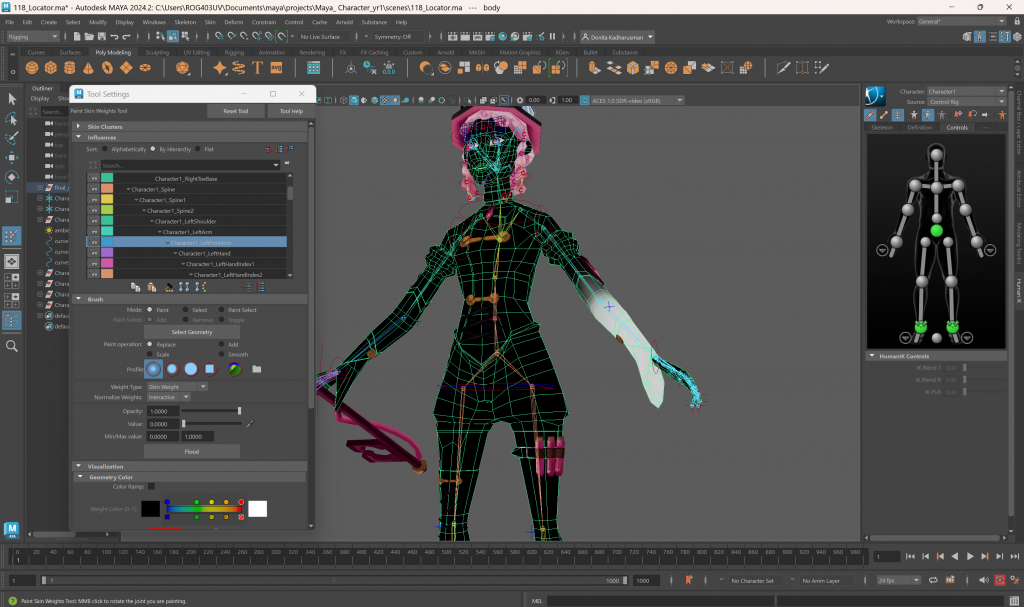
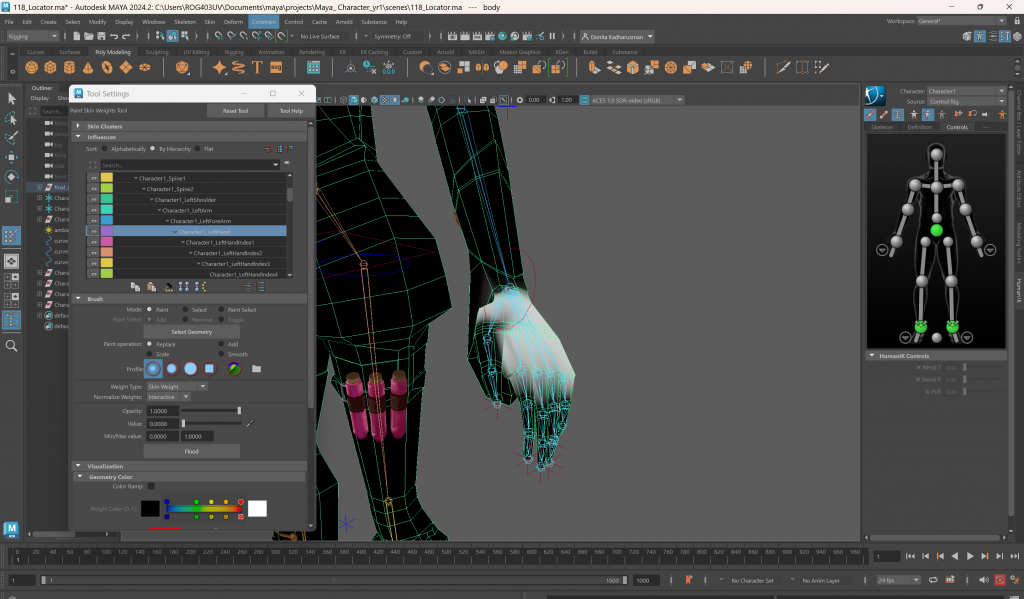
After that, I bound the main body to the IKskeleton and started weight painting. From here I learnt that the colours mean ‘influence’, basically the colour white = influence of 1, black = influence of 0 of the joint, basically if the joint is moved, it will affect the white area, hence sometimes creating an unrealistic bend on some parts so we have to paint / adjust the influences ourselves. A trick to save time with the tight deadline is to mirror the weight from the left side to the right. To attach the remaining accessories, I bound them to the joints where the accessories were attached to and copy the skin weight of the body to the accessories.


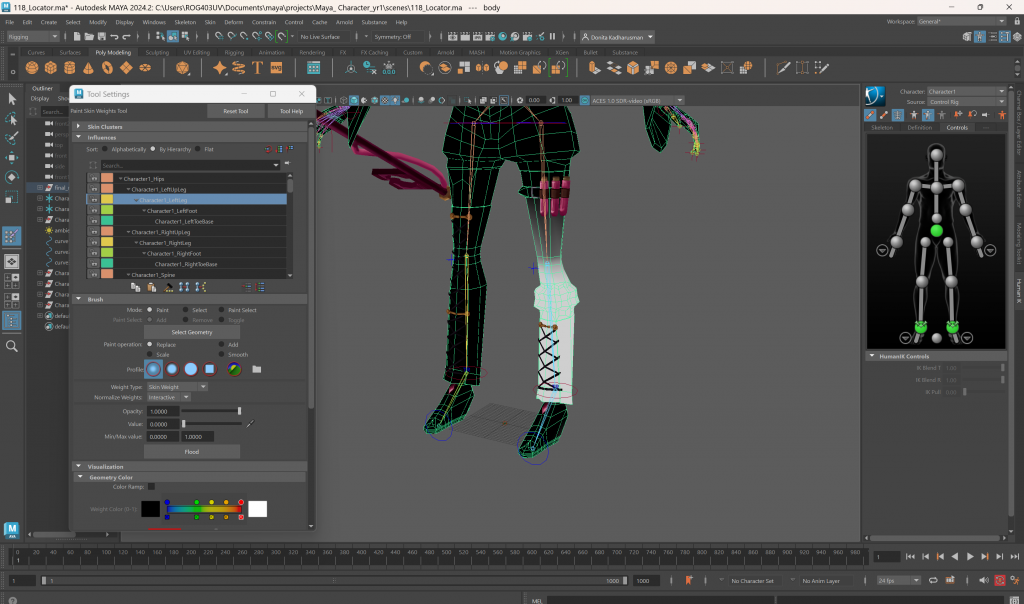
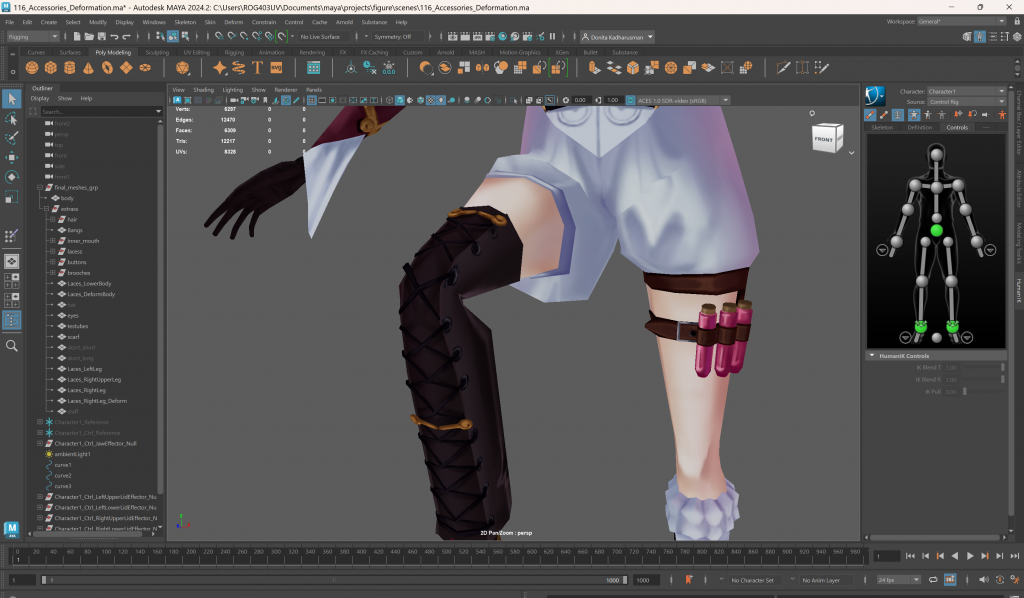
I thought that the laces on top of the knee would cause a lot of issues like what my lecturers told me so I separated this set of laces from the whole laces and when I tried to bind them to the upper and lower joints of the leg and weight painted it, this particular set of laces follow the bend perfectly.
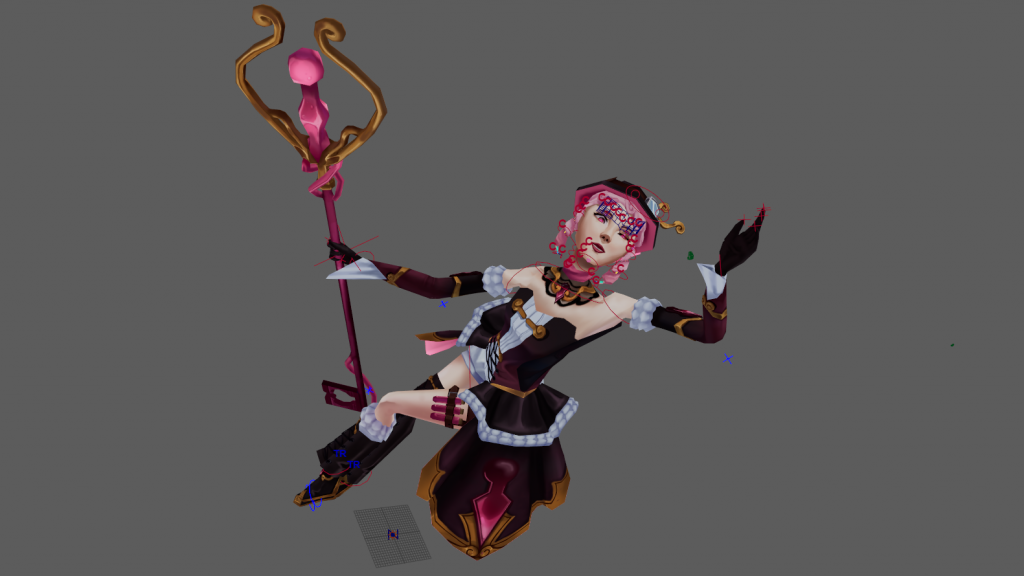
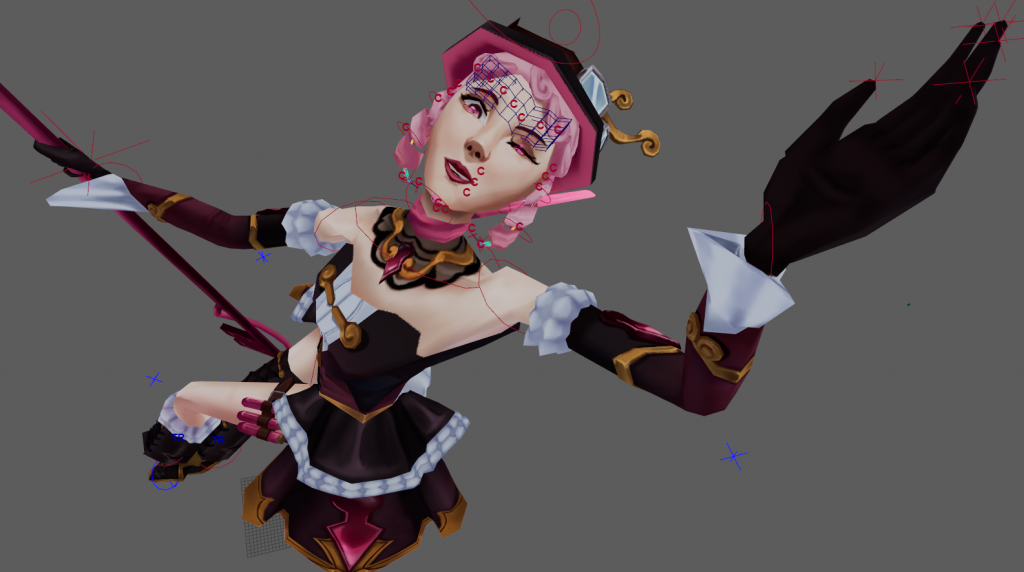
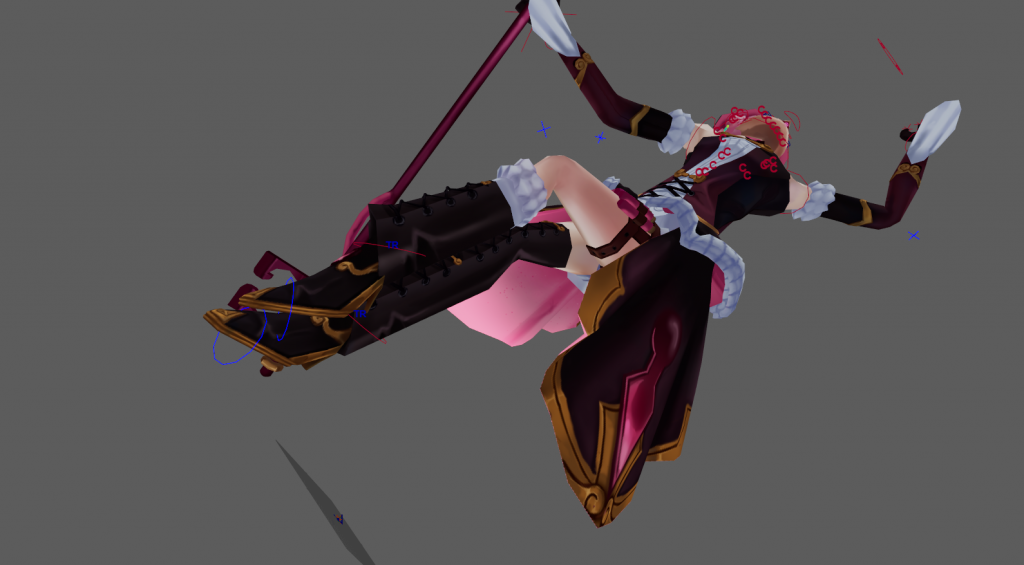
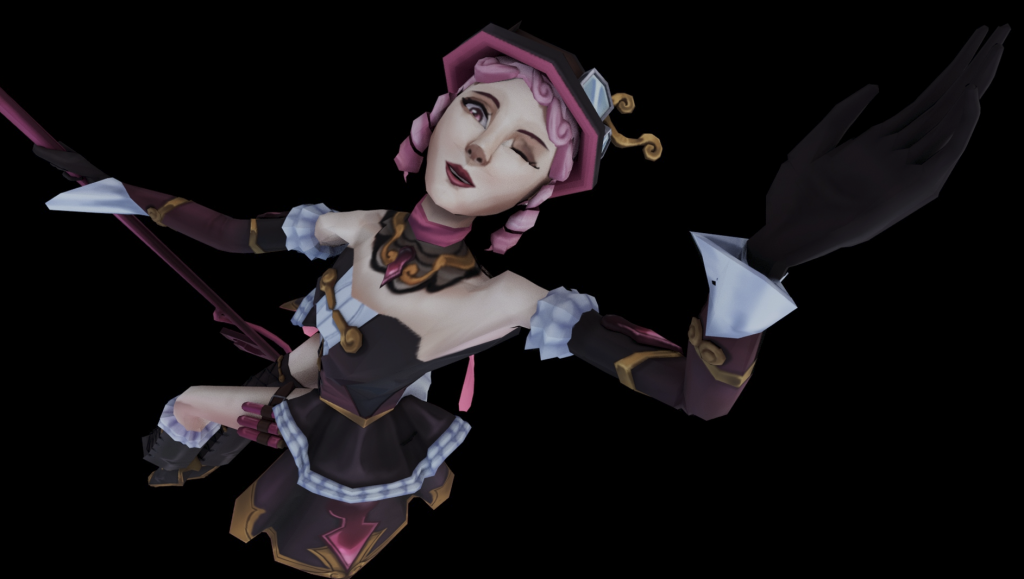
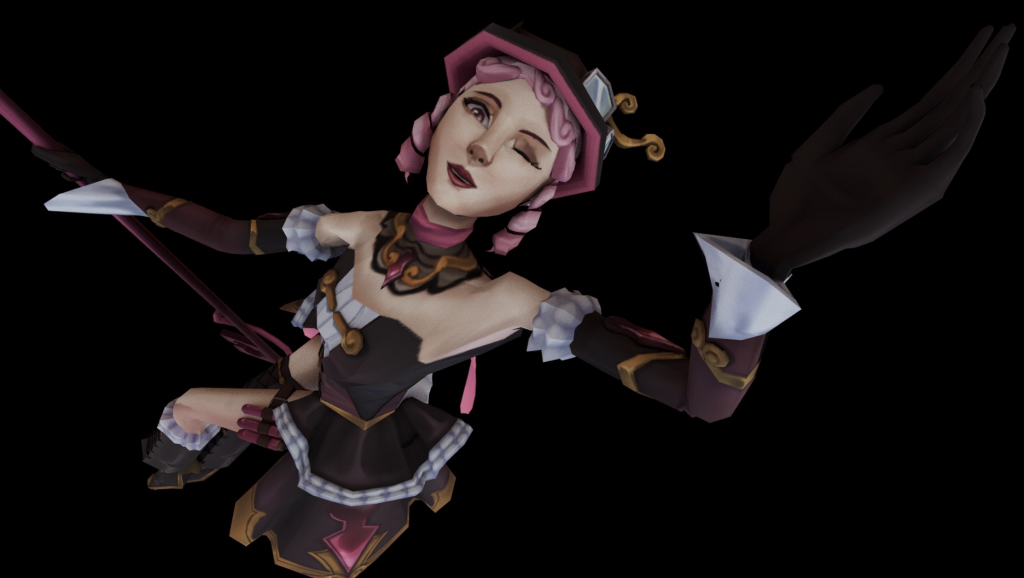
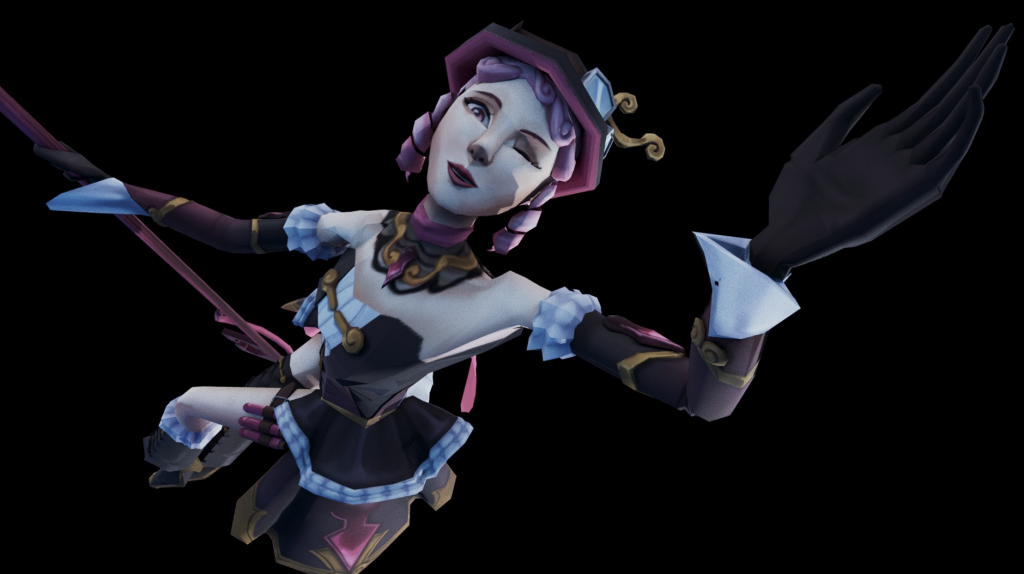
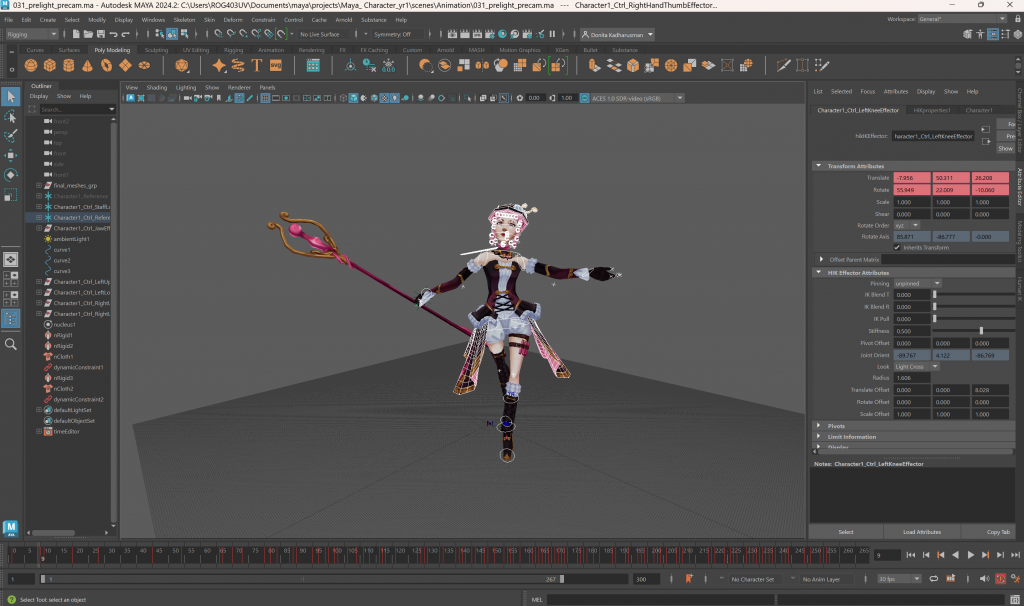
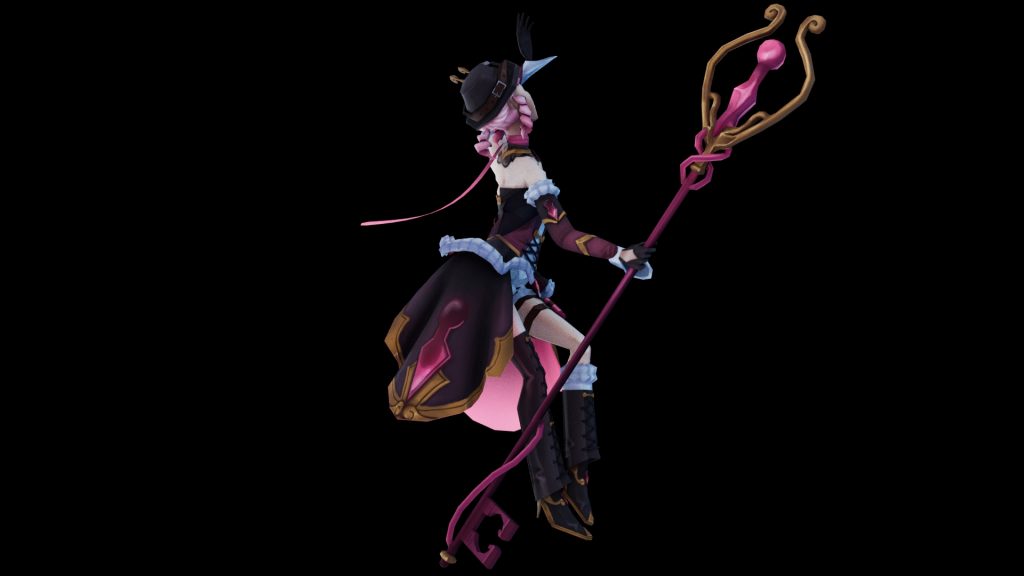
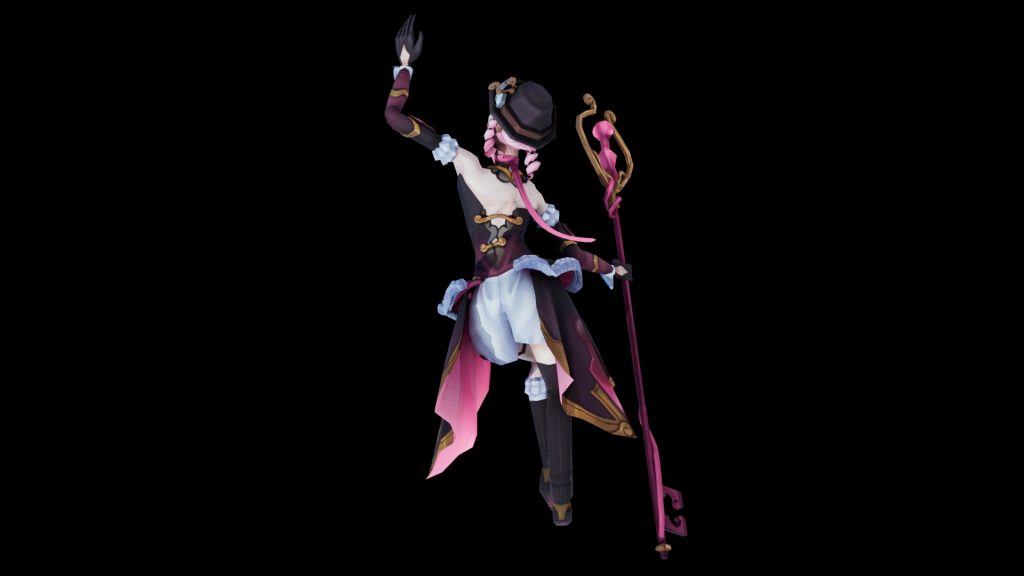
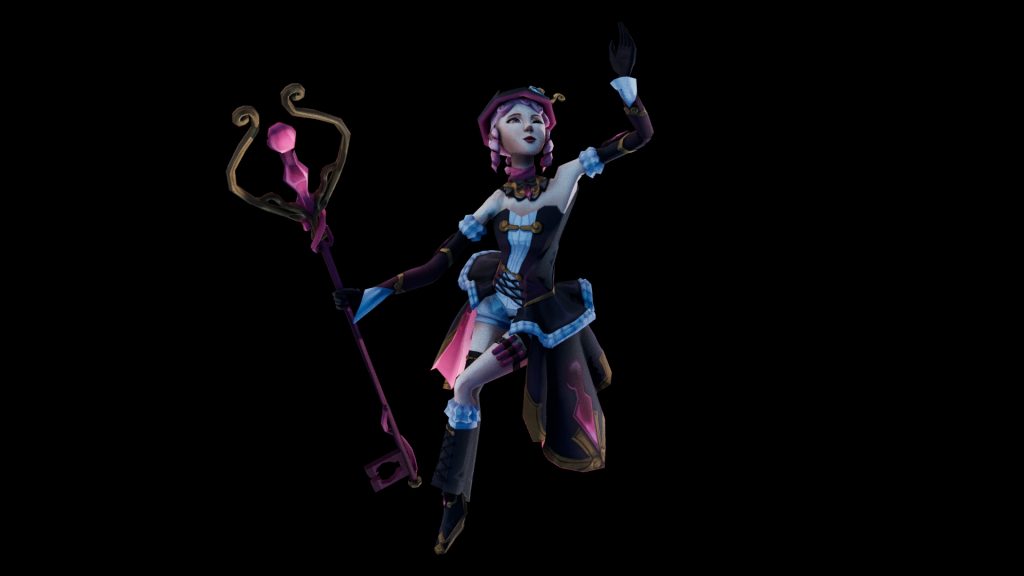
Posing
Afterward, I ideated with a lot of poses so that I could pose the character later on. I wanted the pose to look confident, theatrical, dramatic but also elegant. By exploring these themes, I came up with 9 poses but all of them didn’t sit quite right so as usual I pointed out the poses’ elements that I loved: sitting, crossed legs, hand to the audience, posing to the audience with eye to the camera, hence, creating the 10th pose.

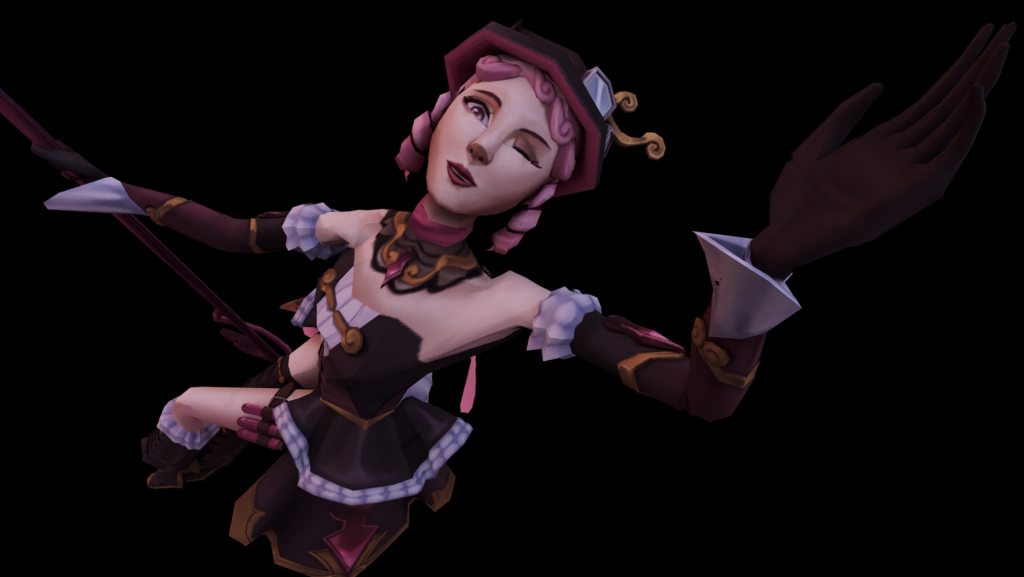
Posing the character was honestly a warmup to the final stage of the project: animating. I learnt how to move the controller and quickly found out that moving these controllers would not be as cooperative as you might think (like you wanted stretch the arms aside but the hand moves backwards), so I had to manually control the controllers from the root to the end (shoulder, elbow, wrist, then fingers). Then I tried to adjust the angle of the camera and even if camera 1 shows all the details of her design, I didn’t like how stiff the camera looked, so I created camera 2 and 3 to be more dynamic. And I went with camera 2 because I’d want to focus on the face as I’ve rigged her facial feature and because I wanted to give her a theatrical atmosphere where she’s basically interacting with the audience.
Then I tried experiment with lighting with one main intention in my head: highlight her pink colour accent. Learning from the diorama project, I used 4k sky images from polyhaven for the sky dome light and quickly found out that the cool blue sky atmosphere was the one that aligned with my intention. As the cold tone highlights her warm pink colour.
Storyboarding
With a tight deadline ahead, I quickly brainstormed ideas of how the animation would be. Idea #1:
- Initial: welcoming to the audience with left hand while right hand carries staff then bow (use like a triangular shape lighting like a stage, then closing curtains)
- Suggestion:
- from victim POV (seeing Davian’s dynamic camera movement looks soo cool)
- strangling the victim up in the air (but she’s not that strong, she relies on chemicals)
- injection from the staff (staff has been UV unwrapped and faces are limited)
- smoke at the end (but she doesnt have a mask to begin with, how is she going to survive if she releases the smoke at the end? Maybe at the beginning, then she appears)
- Conclusion 1: from a victim’s enemy that’s losing consciousness on the ground: Eleanor appears from the pink smoke, Eleanor walks and welcomes the audience, ending on the right side of the victim and lifting the victim chin up with the staff and smacking him until he passes out. (careful time limit: less than 10 sec)
Idea #2:
- Initial: Carefreely spin with the staff letting out smoke and then laughing maniacally (less movement yet many effects) / smile (less time)
- Elements:
- Dancing
- Waltz Dance! Eleanor be the one that’s spun and the staff circling her (she throws her staff to circles around her)
- Move the staff
- Smoke
- Laugh maniacally
- Evil smile at the end
- Conclusion: Briefly greet the pretend audience before posing and waltz dancing and throw her staff around her waist and point the staff to the camera and force the camera to her face as she smiles and grabs the throat of the ‘camera’
Idea #3:
- Elements:
- Showing her ability to mask emotions (lie about her expressions)
- Tumbling; showing that she’s weak
- Widened eyes then slowly look at the camera
- Then smiling evil before black screen (pan at the face from slightly at the side)
- Change camera angles every now and then
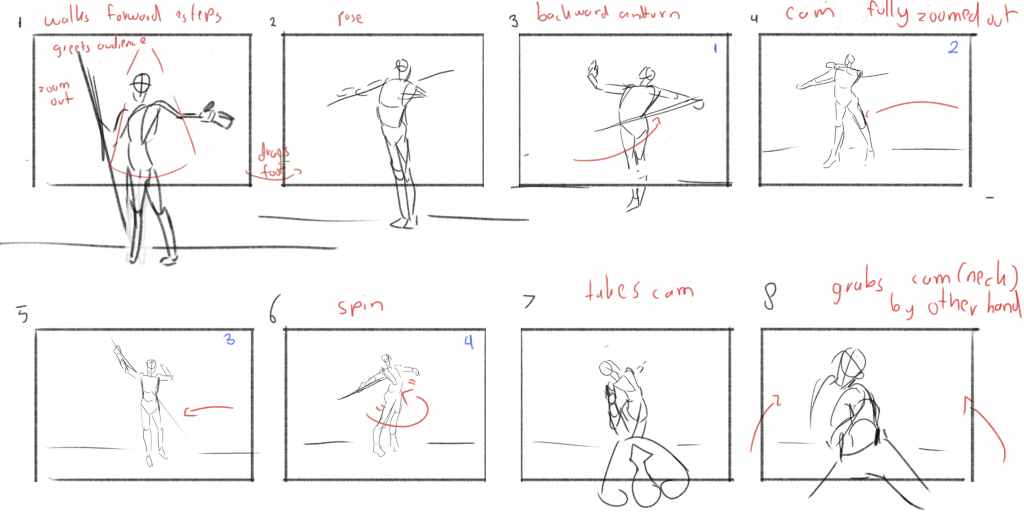
My aim of the animation is to show her theatrical personality despite her brutal work. Even if I had idea 1 from the very start of her creation, the animation would be too long then I came up with idea 2 which requires more animation skill but in terms of flow, it’d be greater, so I went with idea #2 and created the final storyboard.
For a better storyboard timing, i created a video so that I could implement the timing along with the pose when animating.
Link to storyboard video: https://drive.google.com/file/d/1zyybvoQS_OmLGcRsneU3GyRV_xkODuAV/view?usp=sharing
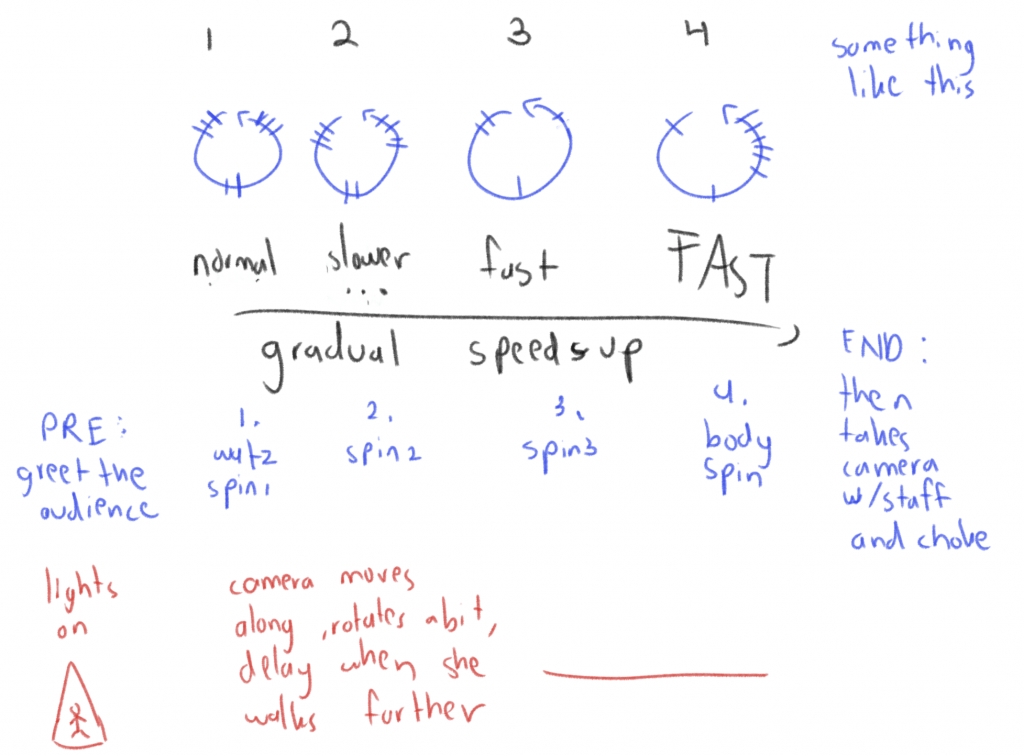
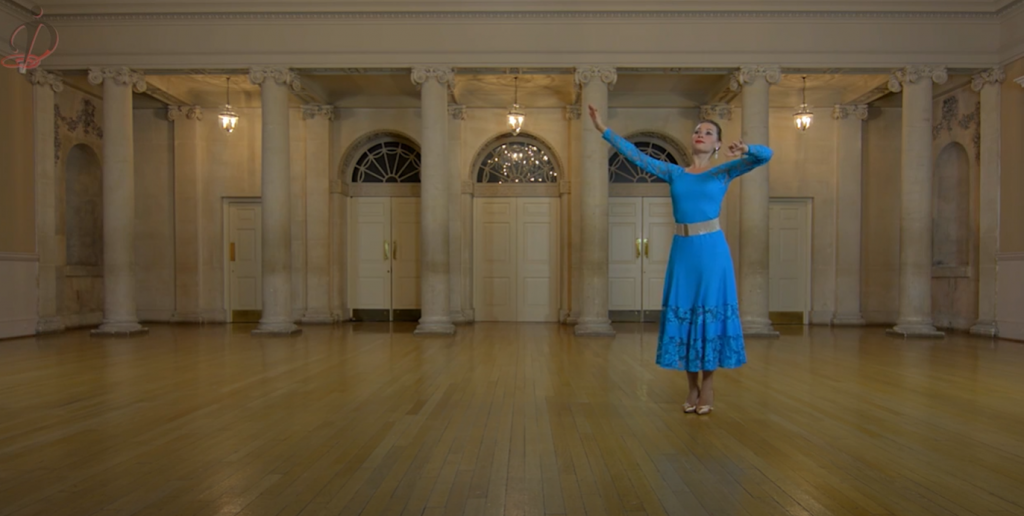
The reason behind choosing idea #2 is this League of Legends animation: Welcome to Noxus (League of Legends, 2025) when Katarina fights the spider lady, Elise. An analysis was done by framebyframe_animation on instagram (2025) how this animation flows very well, as the character spins or rather the flow of the character are repeated 4 times in different timing: first spine with normal speed, second with even slower speed, then the third one faster and the 4th one even more faster. Hence I wanted to recreate this flow with my own animation, with Eleanor waltzing around and finally spinning. (chose waltz as it’s very popular back in the Victorian era)
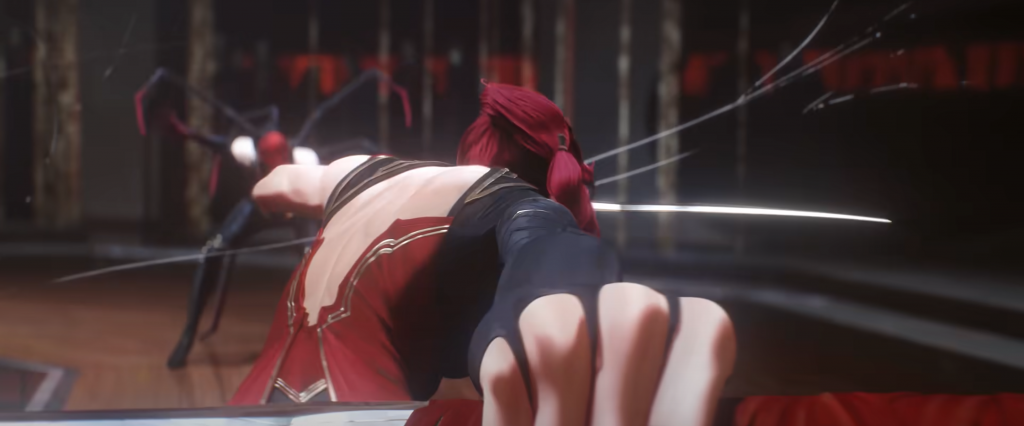
Welcome to Noxus – Bite Marks (ft. TEYA) | 2025 Season 1 Cinematic – League of Legends (2025)
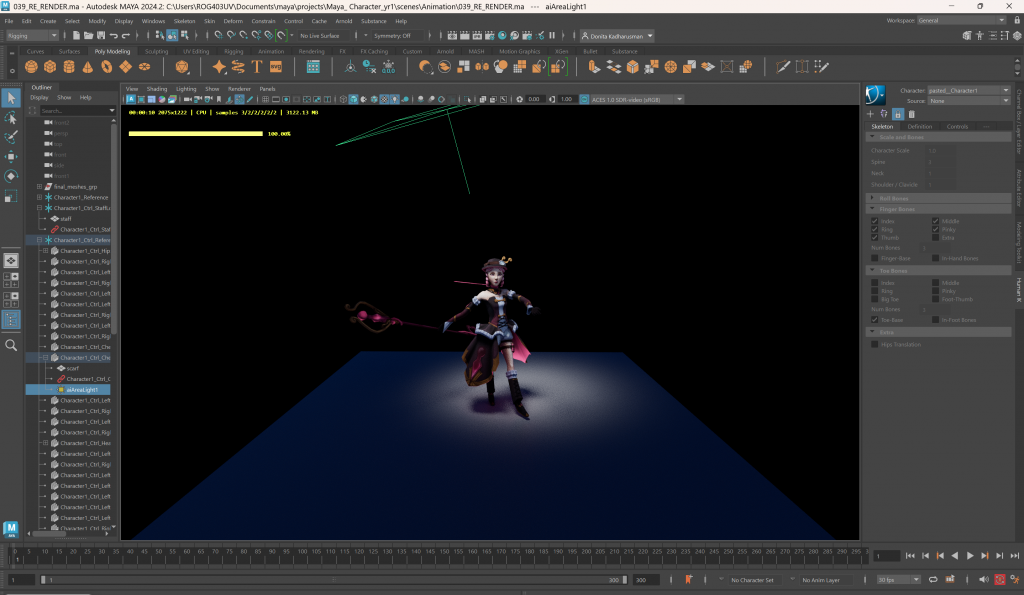
Animation
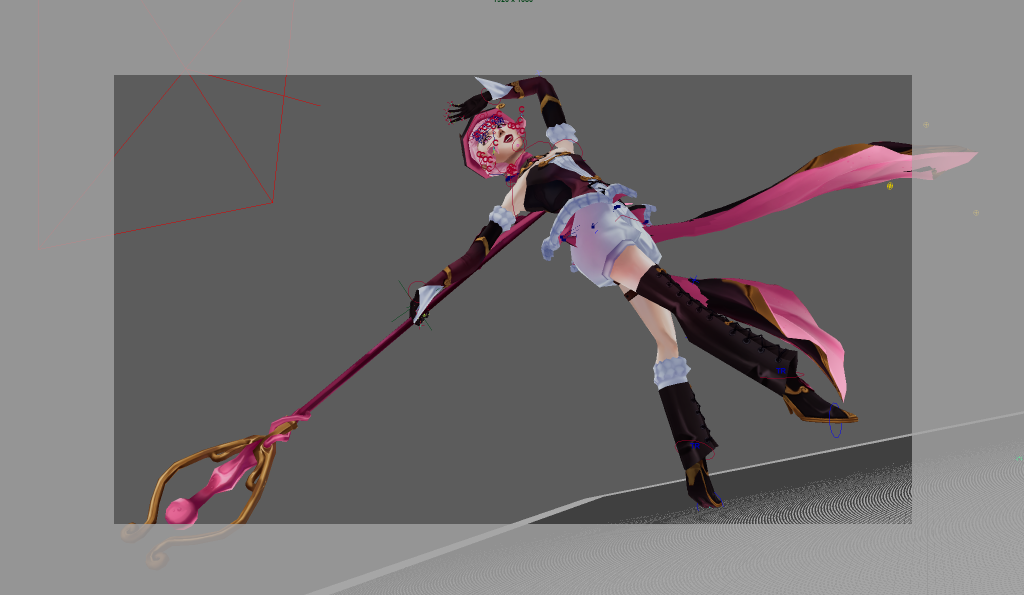
To create smooth animation, I added only essential keyframes of how Eleanor would position herself on the stage (screen) before working on in between keyframes. Then start positioning her footwork, hips, upper body, before positioning her arms, hand, fingers, staff and finally the facial expression and hair. From then, I learnt that the principle of ‘creating the overall form before refining the details’ is used in various things, including in animation.
Another aspect to create smoother animation is to have a reference, hence searching up a ‘Basic Waltz – Spin Turn’ on YouTube by Vivaladance (2014). I adjusted and tweaked the dance a little bit to show her playfulness and carefree while still being elegant by performing waltz, hence I included more hand movement, spins and even a staff throw around her waist.
Feedback: to do the staff throw / drop use a locator, so it could follow the wrist controller but once the weight is reduced to 0, the staff no longer follows the locator / wrist controller. – Michael
Lastly I always reminded myself that there’s a certain rule of how the body moves naturally, which is the whole body tends to follow the root: hips. Hence I would always add a delay on other body parts when it moves and sometimes exaggerating the delay so it’d be more expressive and elegant, as this is an animation not real life. So the order of movements are: hips, legs (thighs, lower feetand feet, then toes), upper body, arms (shoulders, upper arms, lower arms, hands, fingers).
As a former wushu (chinese martial art) student, I learnt that a spear is not as light as it might seem. My arms and hand moved slower and sometimes the weight overwhelmed my wrist as it tend to bend down (that hurt my wrist honestly). From that experience I learnt that spear / staff weight (or any objects that the body holds) affects the body’s movement, hence I tend to add delay her right arms that’s holding the staff.
I ran into a lot of problem while animating, one of the mare rotations. Because whenever I did more than 180 rotations to the character, whether its the wrist or the ankle, it always jumped to negative or positive (when I tried to rotate more than -180 degree), this was because Maya can’t read more than 180 and jumping to negative works the same, yet it can cause a little bit of a jumpy animation. So sometimes I had to fix it by adjusting the rotations more naturally or sometimes I reopened Maya to find that the jumpy effect disappeared on itself.
Another problem I ran into was the nCloth assets, sometimes it would break or swing too unnaturally, to fix this problem I adjusted the nCloth setting itself and the Nucleus. First reducing the Nucleus’s space scale to 0.010, because Nucleus originally reads bigger objects, on the other hand, I increased nCloth’s thickness, bend resistance, stretch resistance, and deform resistance, but also reduced the drag setting.

I created 2 cameras as when she did a certain pose, the first camera would be awkward if it still followed her movement until the end, hence creating the second camera.

To further highlight her theatrical personality, dramatic and stage-pretend atmosphere, I used a spotlight like light to show her that she is the main focus. In order for the light to follow her, Maria (another tutor) told that I could parent the lights to one to the main controller (hips or shoulder). Yet even if it got parented, the lights wouldn’t follow it so after trials and errors I found out that the cache playback was the cause behind it. I used cache playback so I could see the nCloth simulation perfectly in real-time but it wouldnt render the lights to follow the character, hence it was always following the character from the start, but the cache playback seems not to render it in the preview. With the time that I have left, I could render the frames out from Arnold.
Outcomes
Video Links:
- 360 Pose: https://drive.google.com/file/d/1h_L9d6EqBZ1b1YnizKToJAP736VE2Ndn/view?usp=drive_link
- Animation: https://drive.google.com/file/d/1V60DX7BieUsY6VHURgiPamHGU-h-M0Hz/view?usp=drive_link
- Front View of Animation: https://drive.google.com/file/d/1j6WgEa7i4vXkj0fsLWJXUK88KnxHELJ8/view?usp=drive_link

Bibliography
Framebyframe_animation (2025) ‘Studio: Fortiche Prod @fortiche_prod’ [Instagram]. 19 May. Available at: https://www.instagram.com/reel/DJ17_bwu-V3/?igsh=MXJmeG1jNWhxZHE3Zw== (Accessed: 25 June 2025).
League of Legends (2025) Welcome to Noxus – Bite Marks (ft. TEYA) | 2025 Season 1 Cinematic – League of Legends. 7 January. Available at: https://youtu.be/I76wvt0aEE4?si=YsqrOYbDpjpGJocD (Accessed: 7 January 2025).
Michael Banks (2020) Maya 2020 TAIL RIG tutorial. 13 August. Available at: https://youtu.be/bRzcdpn7m2A?si=g558MxFbUxem1A80 (Accessed: 29 May 2025).
Riot Games (2009) League of Legends [Video game]. Riot Games. Available at: https://www.leagueoflegends.com/en-gb/download/ (Accessed: 21 April 2025).
SARKAMARI (2021) Maya Facial Rigging 03: Skin Deformers. 10 January. Available at: https://youtu.be/-D_Q3J_UeYg?si=-CmHhVeRzpCJSd6T (Accessed: 30 May 2025).
Vivaladance (2014) Basic Waltz – Spin Turn. 31 August. Available at: https://youtu.be/oMcUM7A36Fo?si=JEEw0UqnLx1Zz8oZ (Accessed: 29 May 2025).