3 – 9 March, 2025 — Donita Kadharusman
Games Art Pipeline 24/25
2D — Creature Concept, Week 3
Anatomy Study (arms & legs)
In the third week, our tutor suggested a 3D sculpt exercise regarding human anatomy to deepen our understanding of this subject. This was also because many creatures share anatomical similarities with humans, so studying human anatomy could help us understand and apply these elements to our character concepts realistically.
As I wasn’t yet confident in my 3D skills, I decided to approach this exercise by studying and observing anatomy in 2D. I chose to study the muscle anatomies of the arms and legs, as I found them particularly difficult and complex. Additionally, this study was also impactful for my chicken character concept, as its arms and legs are mostly exposed flesh and muscles.
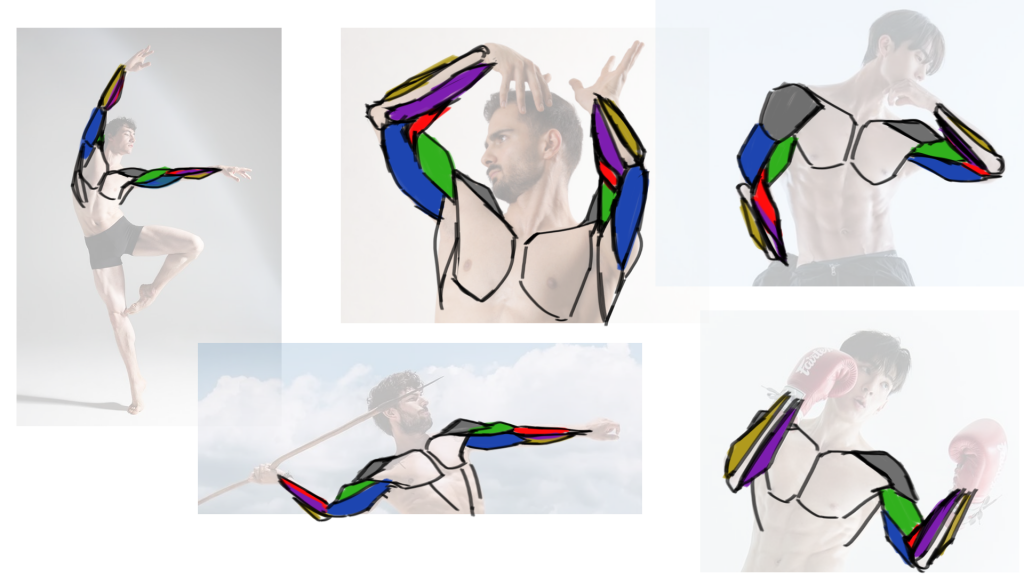
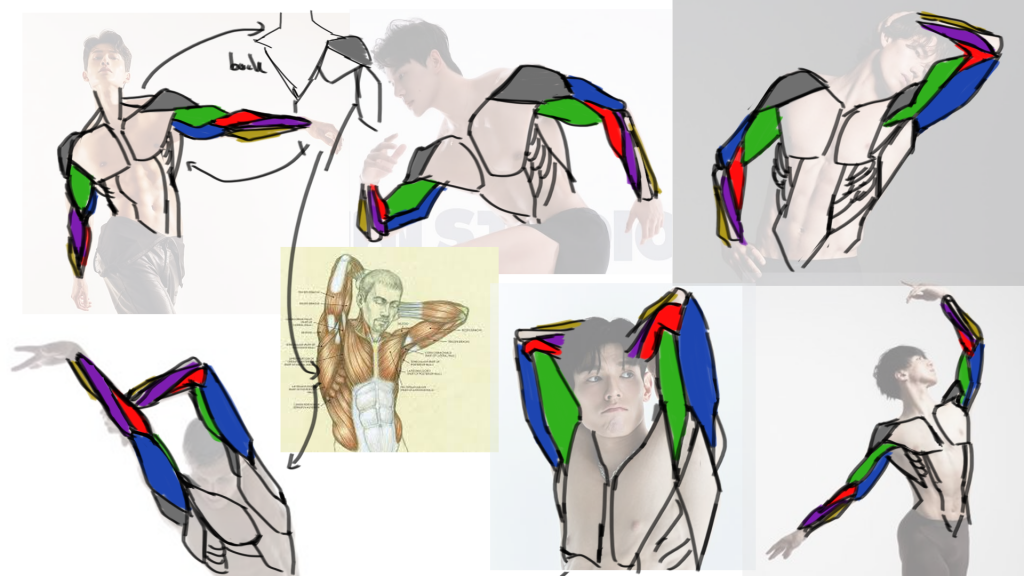
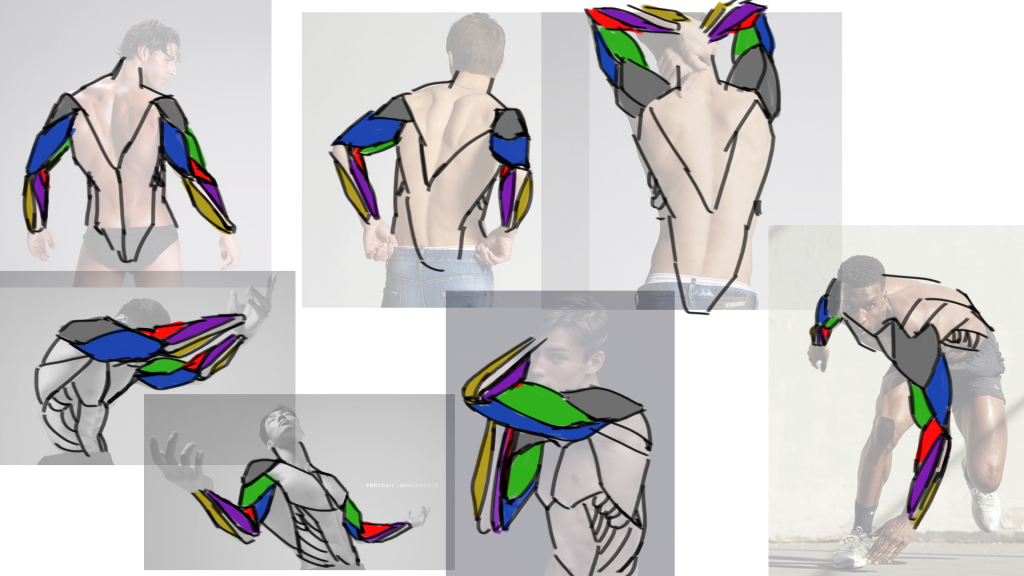
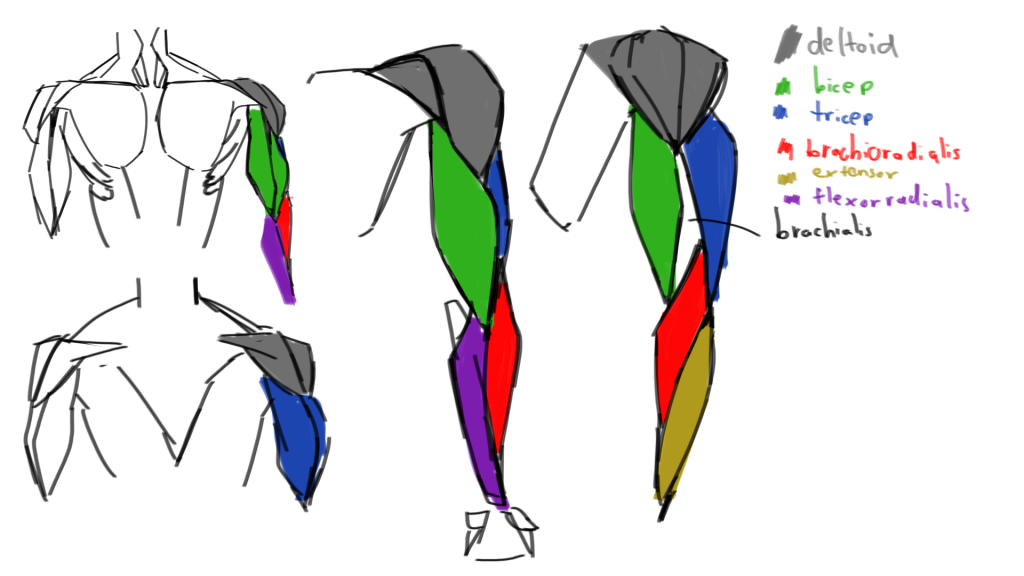
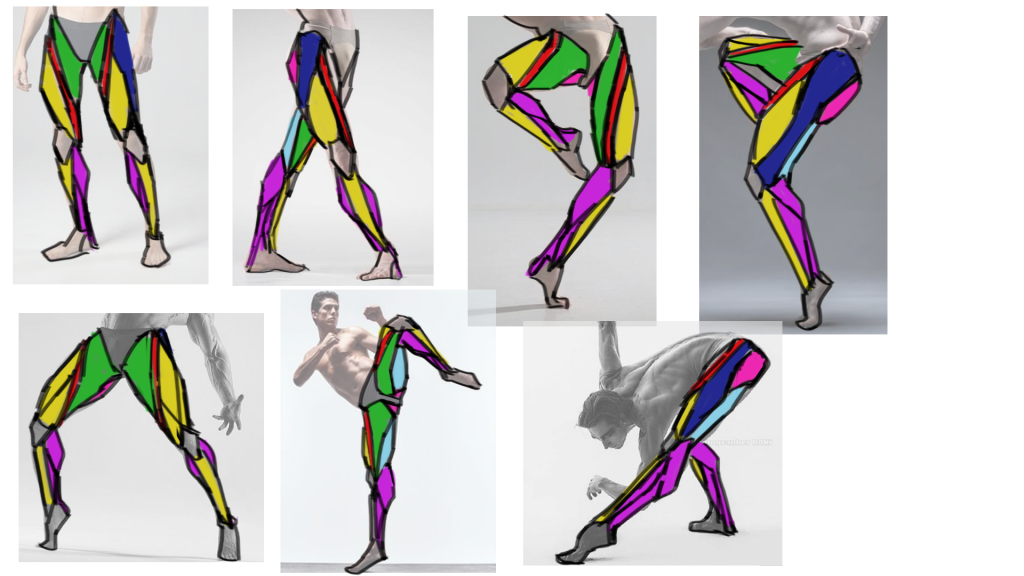
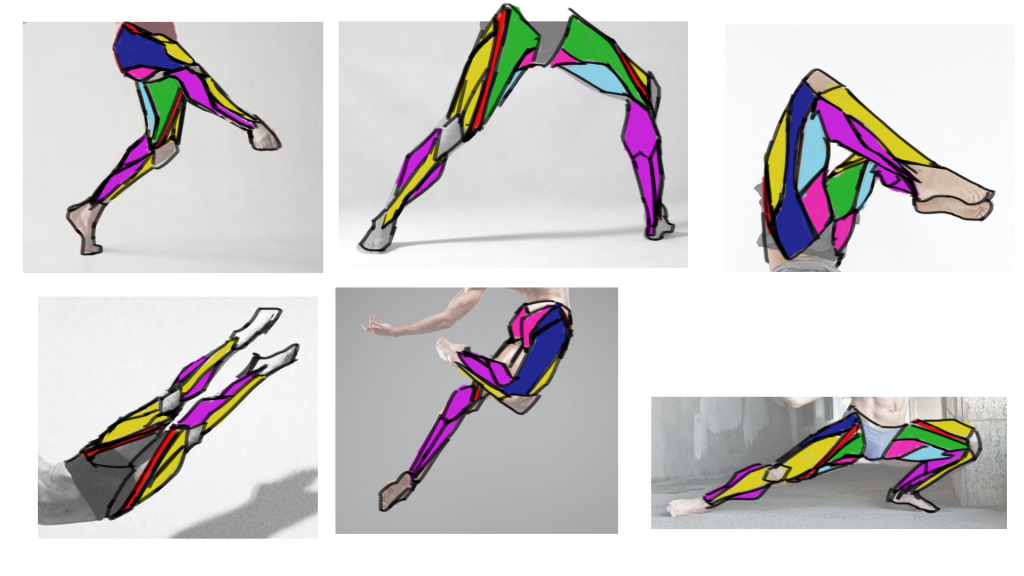
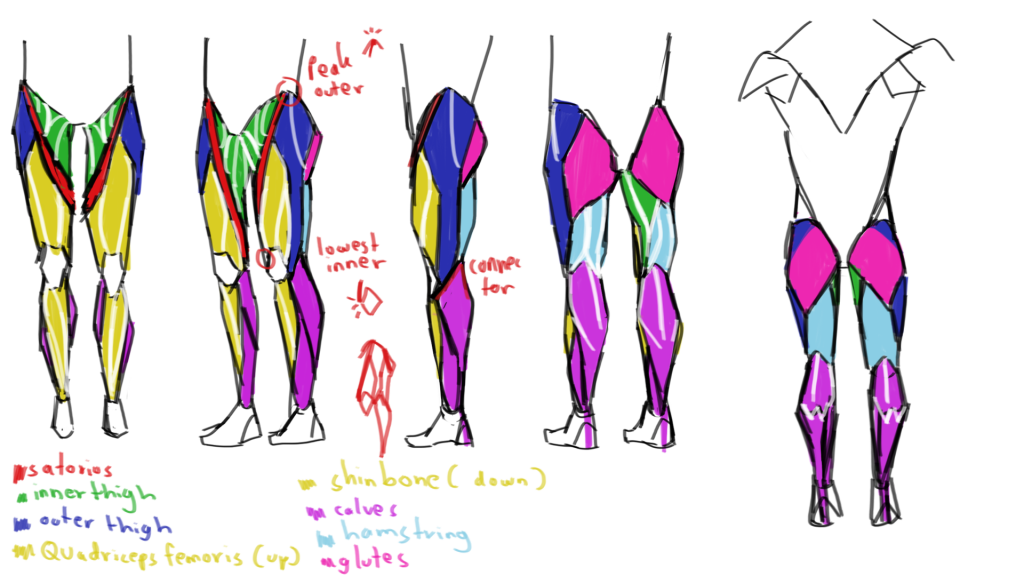
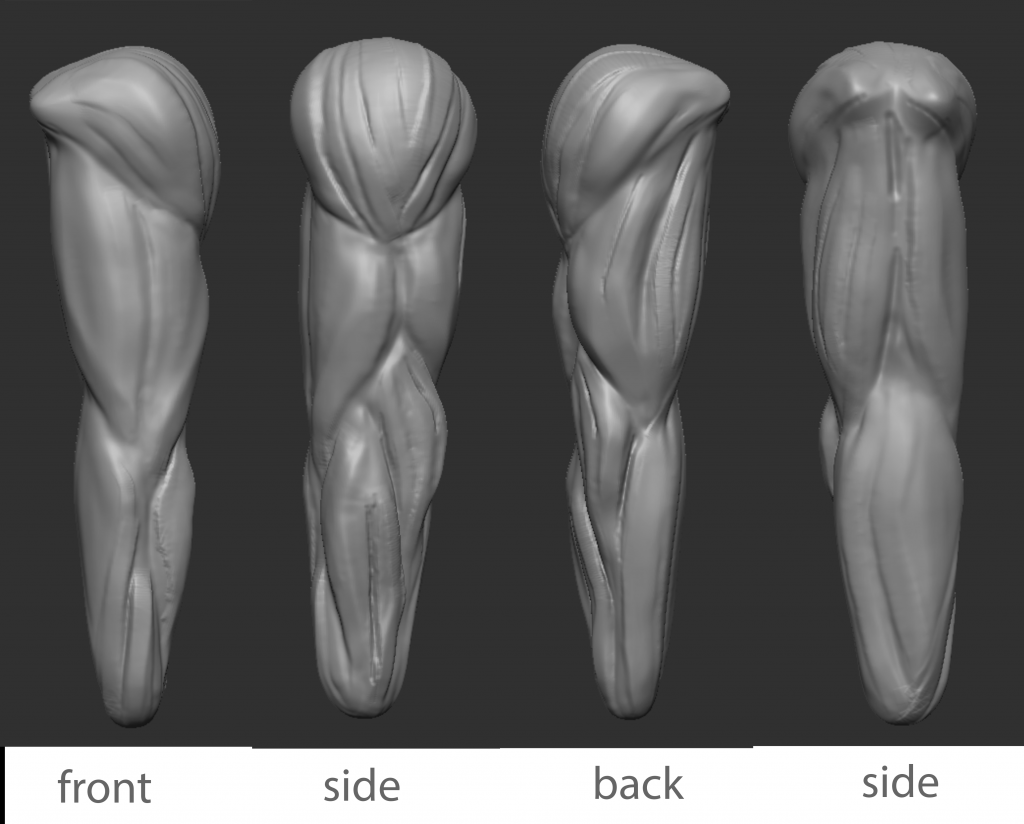
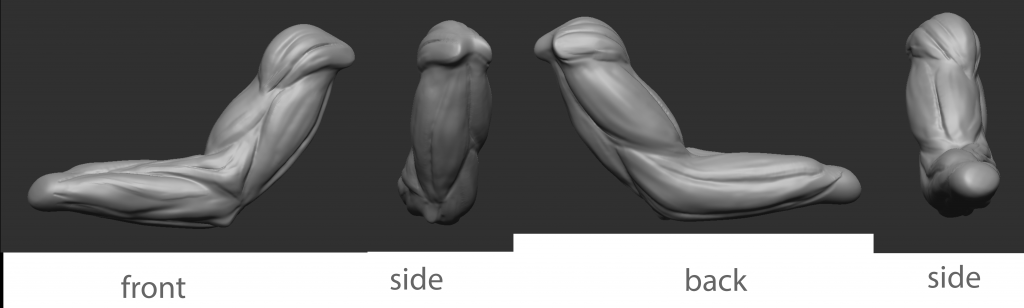
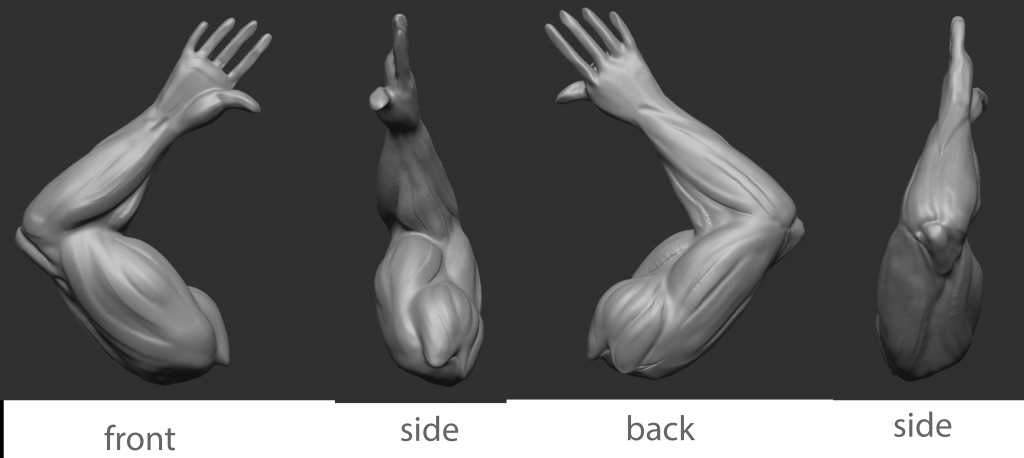
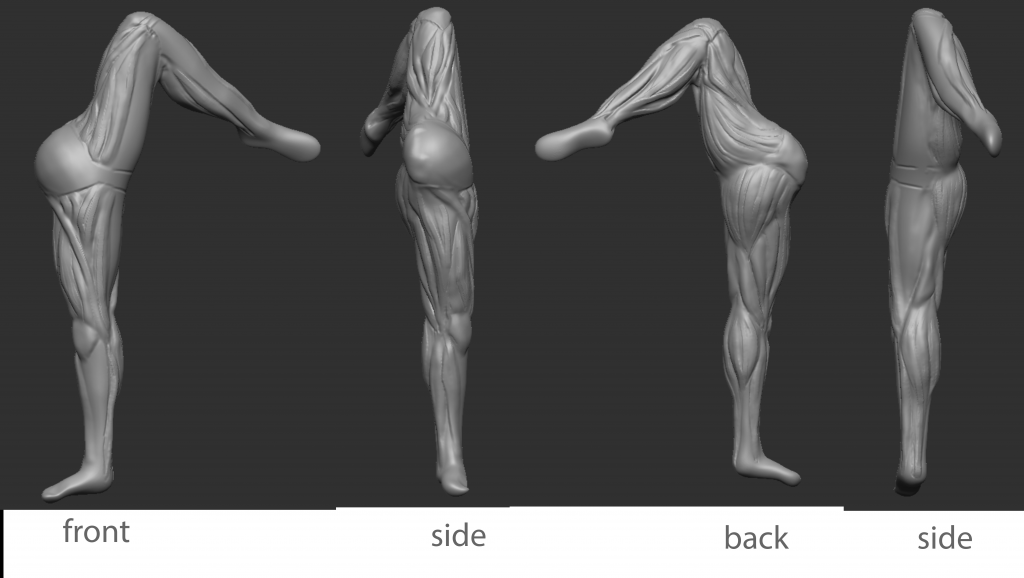
At first, I used the Zygote Body website provided on Moodle, which provided a full 360 view of the human anatomy (including skin, bones, flesh, etc.). This allowed me to map out the muscle groups by colouring each group with different colours to fully understand their placement. I then continue to grab real-life references with various poses and mark each muscle group. I specifically chose muscular bodies for the references, as their muscle structure and positioning were easier to identify and study.
I was initially confused about how the upper and lower parts of the arm connect, but I found out that the brachioradialis (coloured in red) is the muscle that connects them. It’s positioned on the outer side of the arm, between the bicep and tricep. It also extends down to the thumb, hence it twists from its starting position (between the bicep and tricep) to follow the direction of the thumb as the arm moves. Understanding this enabled me to make this muscle as a key anchor muscle to help define the placements of the rest of the muscles during the exercise.
For the leg anatomy, I made the sartorius muscle (also coloured in red) as the anchor muscle to map out the surrounding muscles. As it connects from the outer top of our thigh to the inner side of our knee.
(I didn’t expect leg anatomy to be more difficult than the arm…)

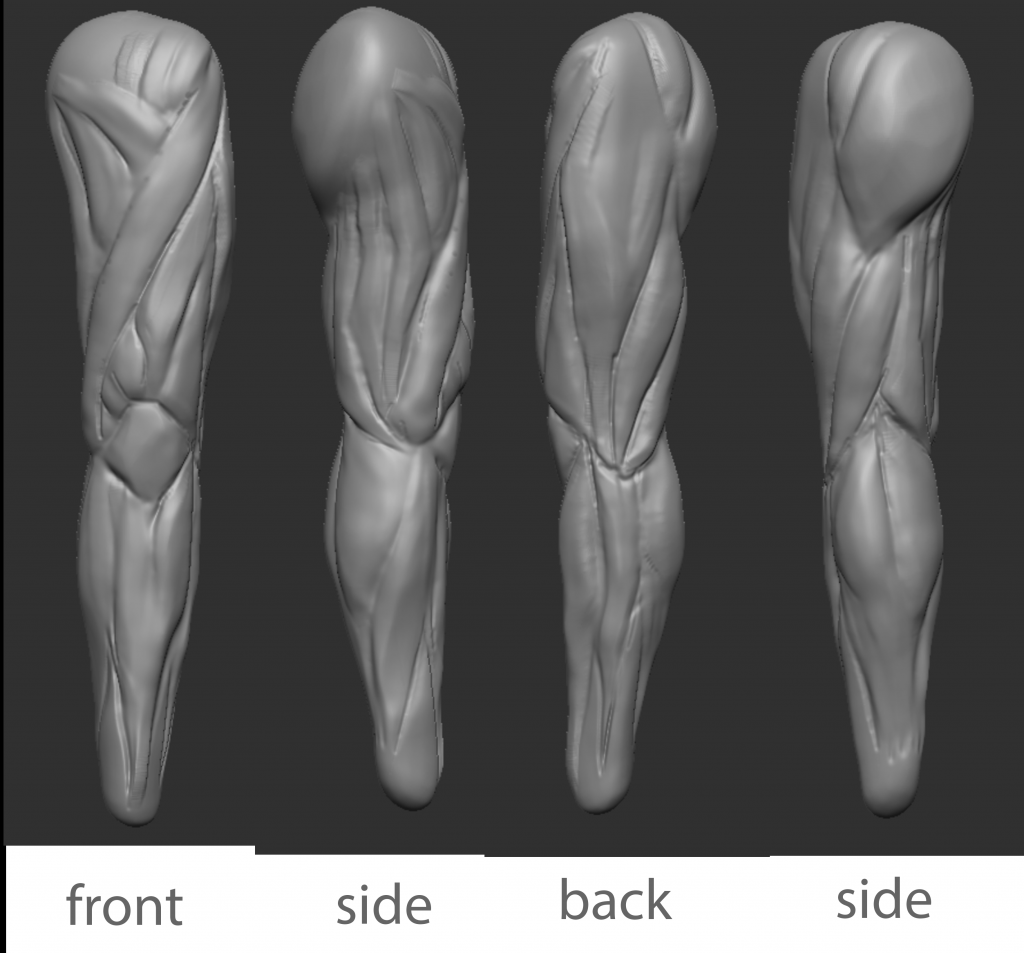
Transitioning these muscle anatomy studies from 2D to 3D was quite a struggle at first, as my mindset still viewed it from a 2D perspective. However, I managed to adapt. Not only was I satisfied that my initial studies had paid off, but I was also happy that I was able to carve out the overall details of the muscle group and fibres, making them appear like exposed muscle rather than just skin. To achieve this texture, I combined the use of the Z add mode of the ClayBuildup brush to add clay with the direction of the muscle groups and then used the Z sub mode of the standard brush to carve out the dents, enhancing the definition of the muscles.
Sketches
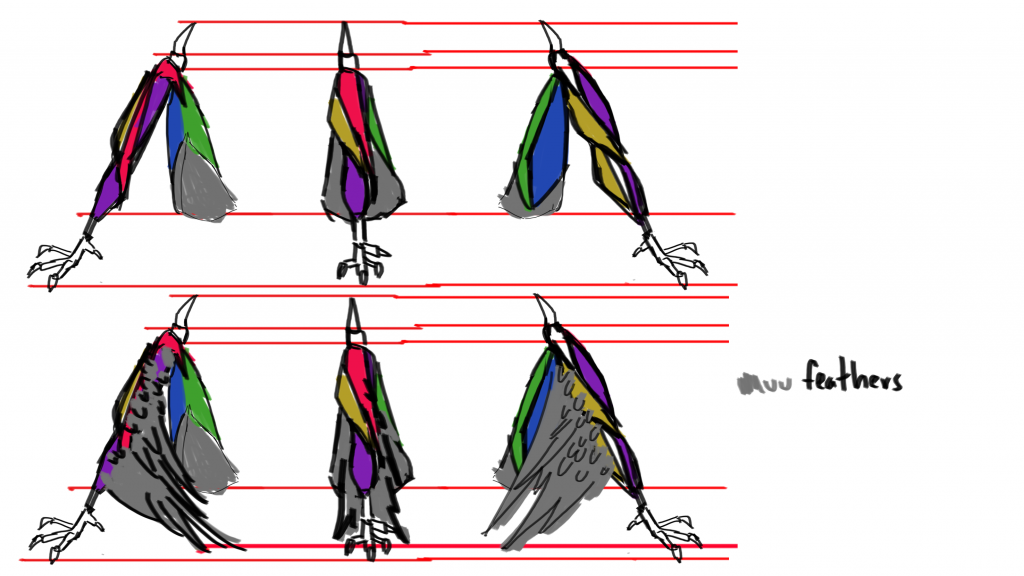
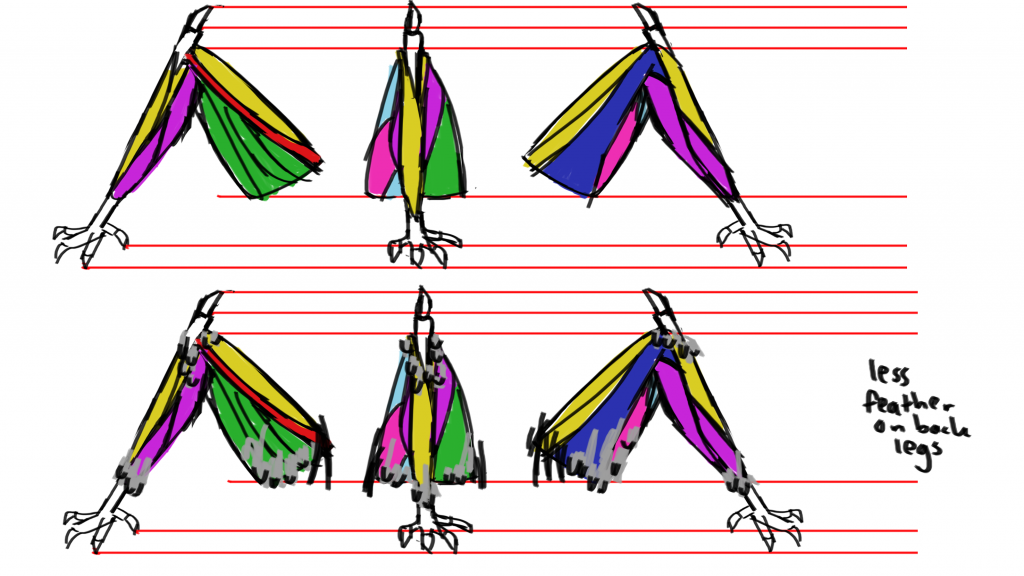
The anatomy studies were really helpful, especially since I initially had started to doubt whether I could sculpt the chicken’s arms and legs realistically. Because of this, I gained confidence and knowledge of the overall arms and legs anatomy, hence, I was able to alter and apply these muscle structures to shape the chicken’s legs and arms according to the character sheet. Before heading straight to sculpting, I sketched the turnarounds of the chicken’s arms and legs as a guide for my model. Furthermore, I matched the colours of the muscles like my earlier exercise to easily identify each muscle group.
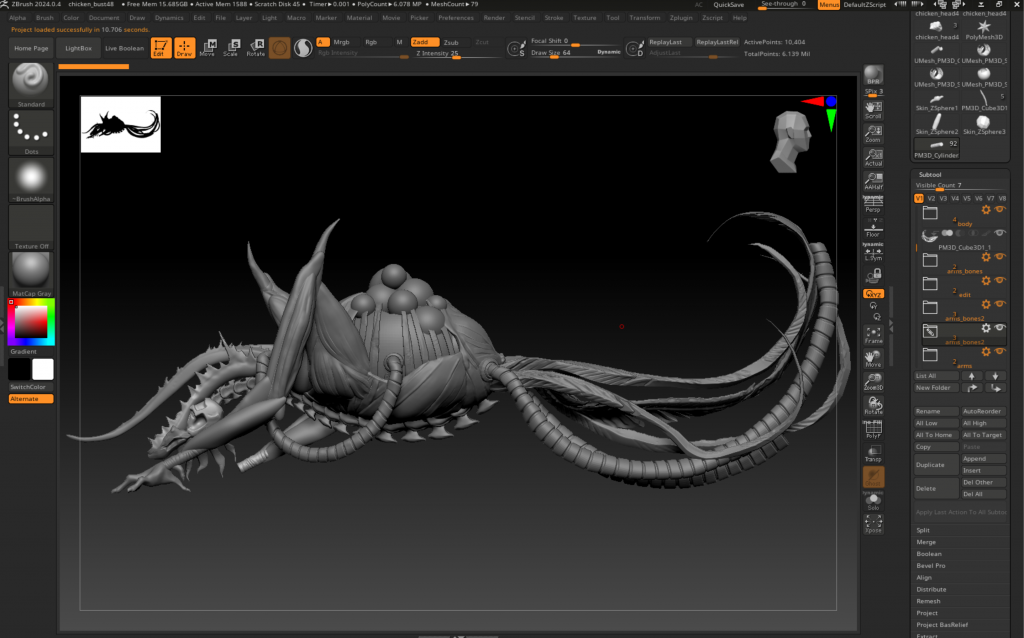
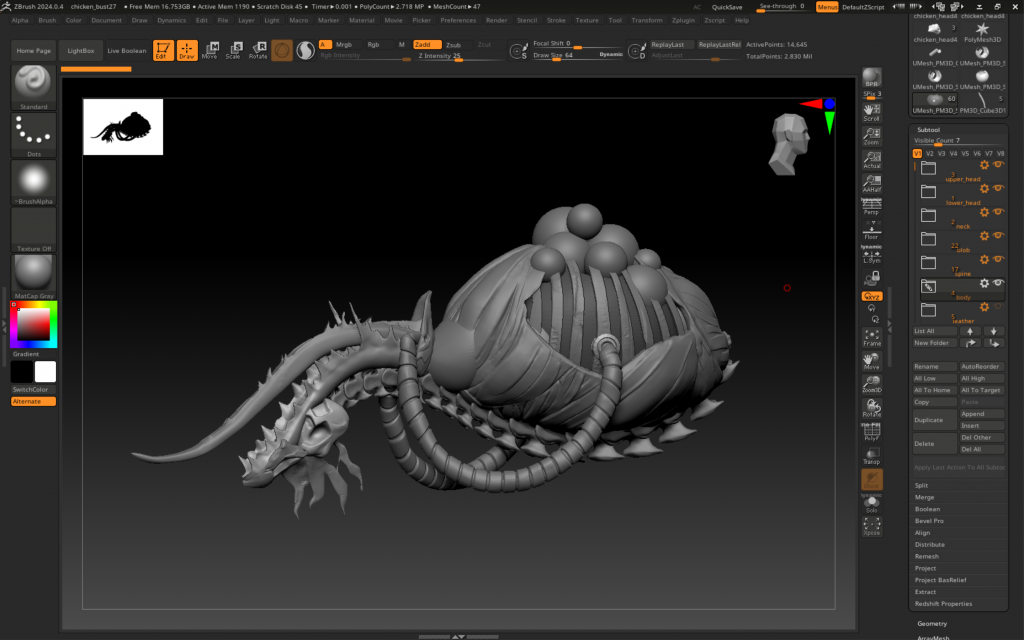
3D Model (body)
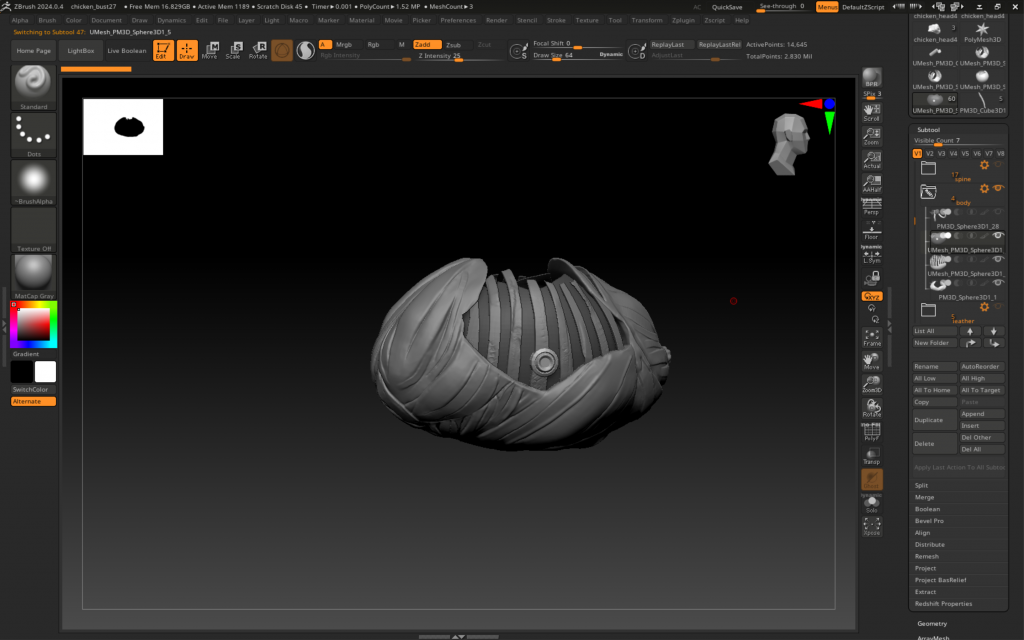
With the turnaround sketches of the chicken’s body parts as references, I was able to sculpt its muscle groups and flow easily. Furthermore, the arms and legs muscle anatomy sculpting study really helped, as I could apply a similar workflow to the chicken’s body muscles. While experimenting with various brushes during the process, I found a cylinder brush that creates a pipe model. As a result, I could save time and use the free model ZBrush had provided. Unfortunately, it took me a while to get used to its function, as I needed to draw a line from its start and end on the chicken mode which often snap to a nearby mesh. To solve this, I had to hide non-essential meshes for a better result. Another problem I encountered was with the pipe’s path, as it wouldn’t always follow the intended flow. Hence, I had to manually redirect the flow with the ‘move’ brush, which also caused some parts of the pipe to be slightly flattened.
I also discovered the ‘Mirror’ function on the ‘Tool’ menu, which allowed me to flip the mesh. Hence, I was able to duplicate and mirror one of the pipes for the other side of the chicken’s body. I plan to use this tool again in the future, especially for mirroring its arms and legs.
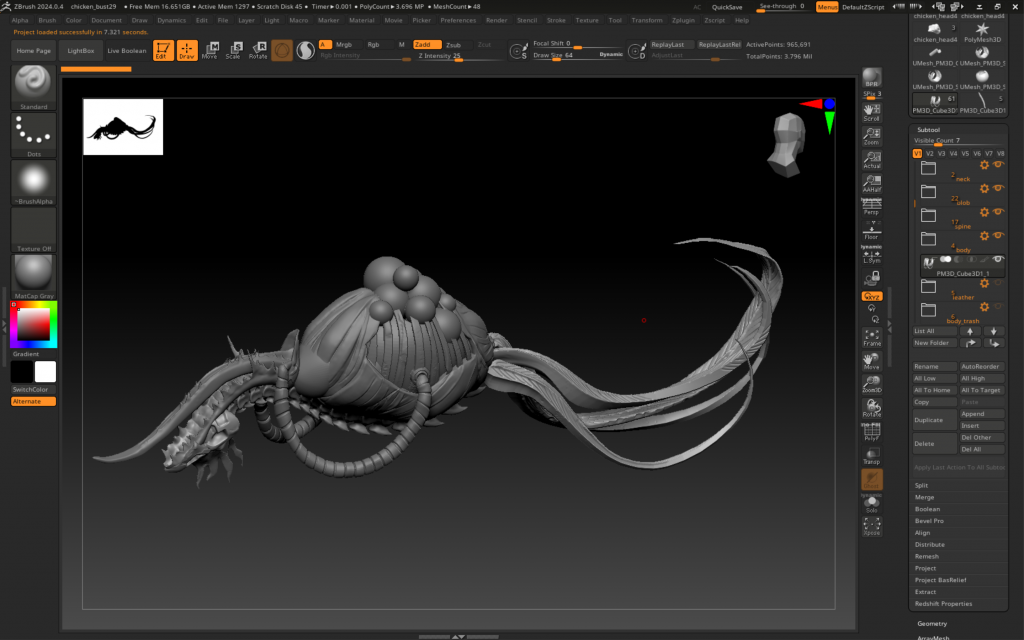
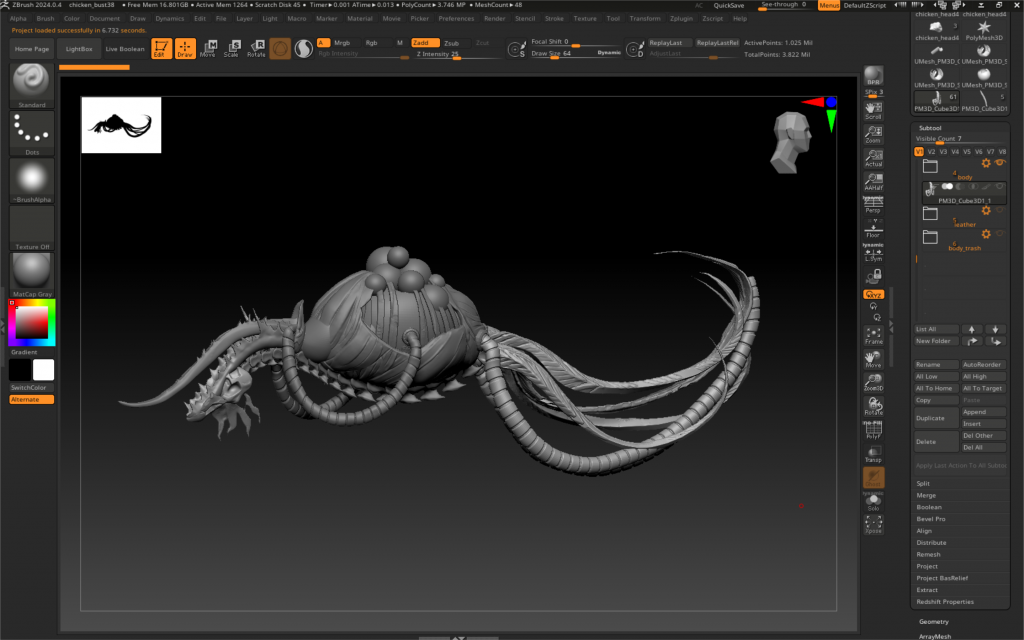
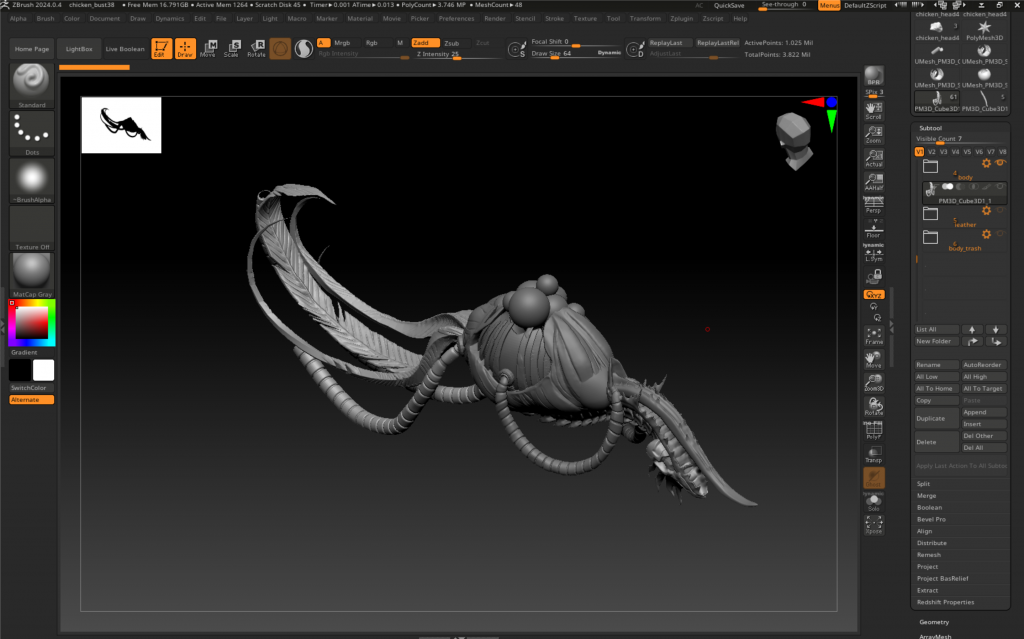
3D Model (tail)
I had to come up with a creative idea to create the tail’s base model. I started by using thin rectangular meshes and positioning them to create a flowy tail according to the concept art, then merging and DynaMeshing them. As for the other tail strands, I used a small box with one end shaped into a sharp point, then elongated and curved it with the move brush.
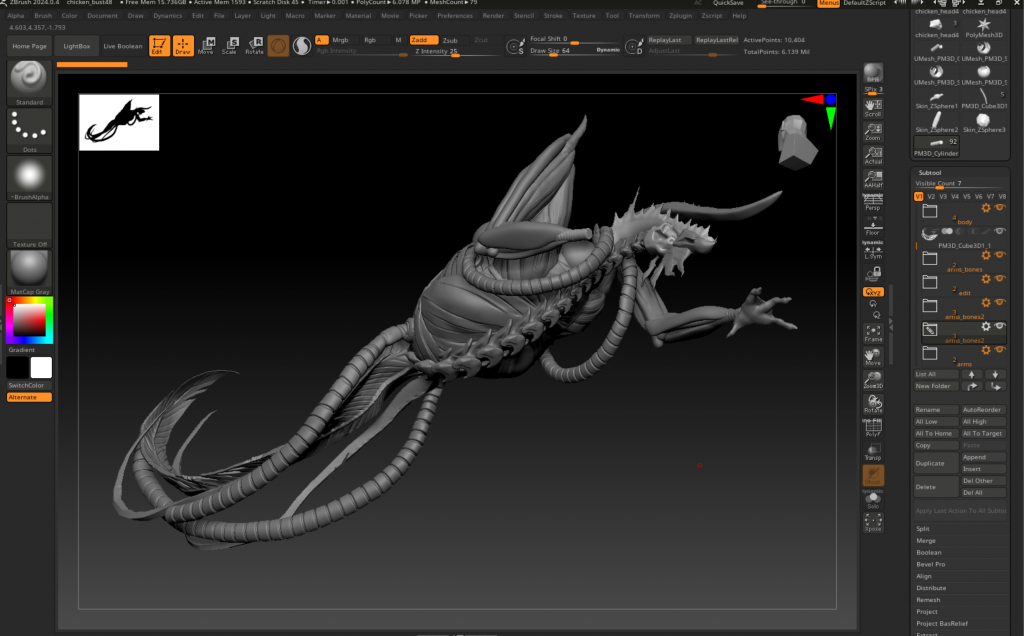
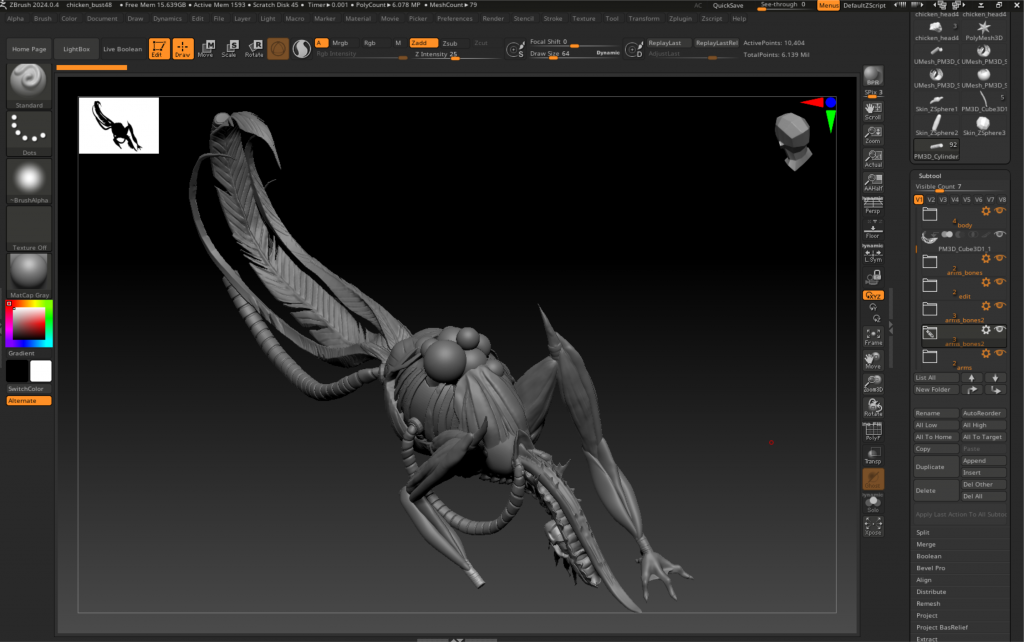
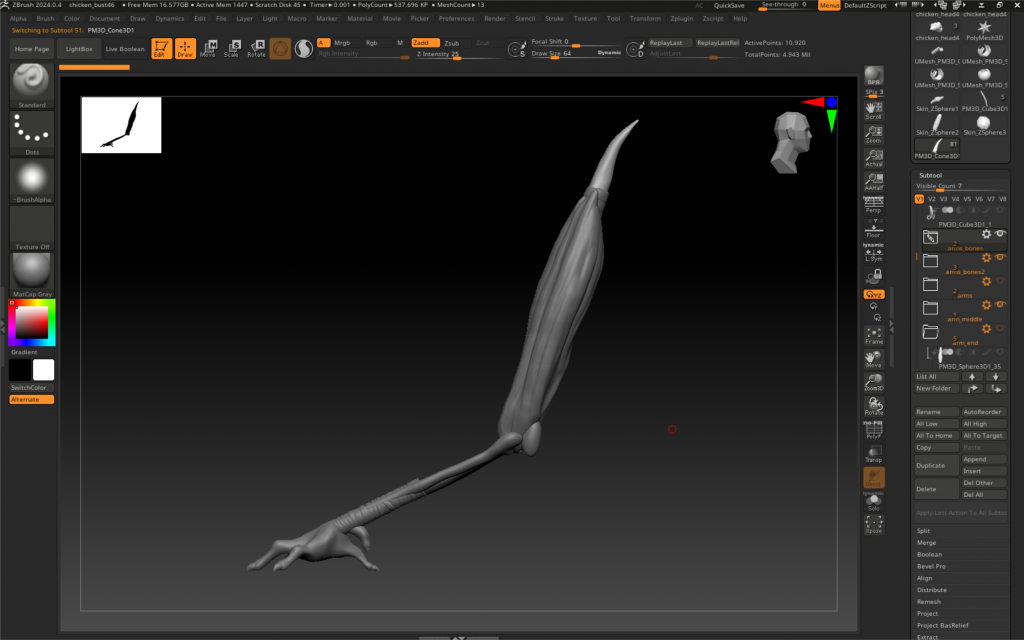
3D Model (arms)
Upper arm model:
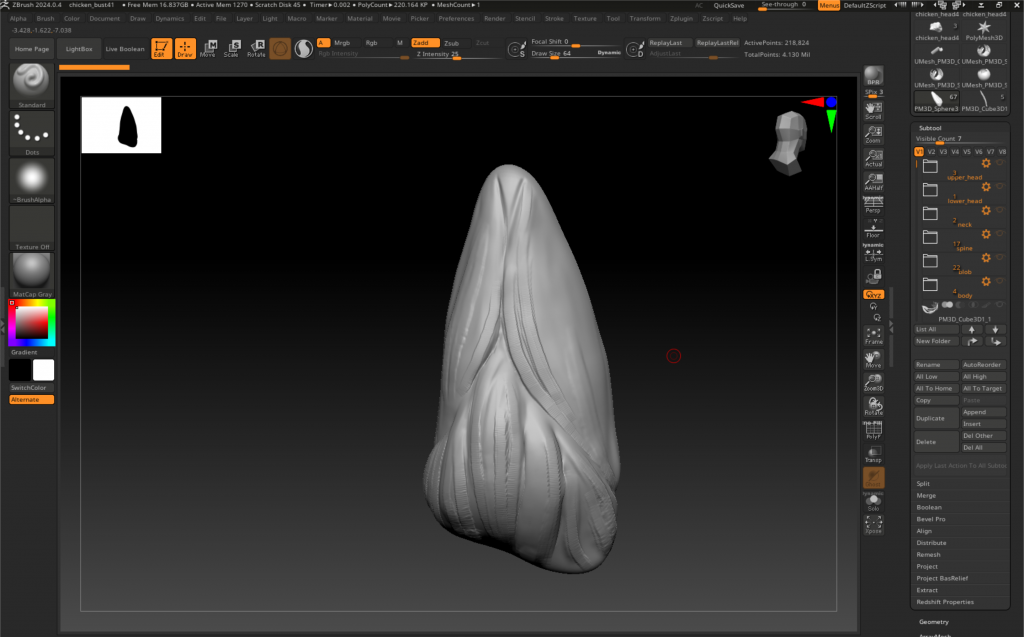
Before continuing to sculpt the entire arm, I first modeled the bones to serve as a structural guide for sculpting the remaining flesh and as an element to enhance the horror aspect of the design. Adding sharp bones at the top of the arm to show its triangular shape/dangerous behaviour. Also, the reason for this unnatural shape and design is that the creature’s bones and DNA were altered, causing the bones to be forcefully bent.
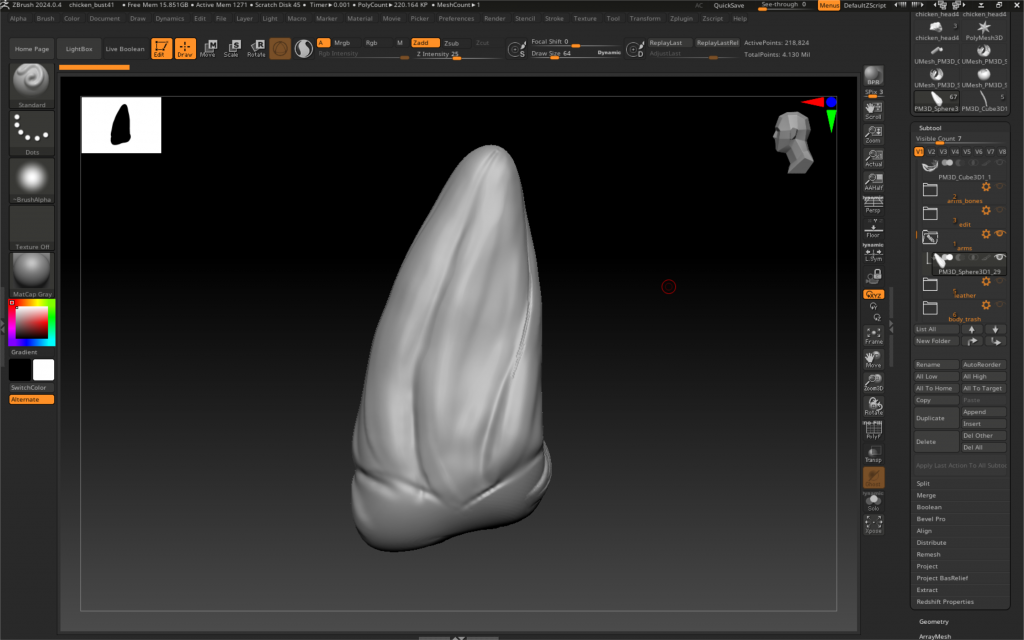
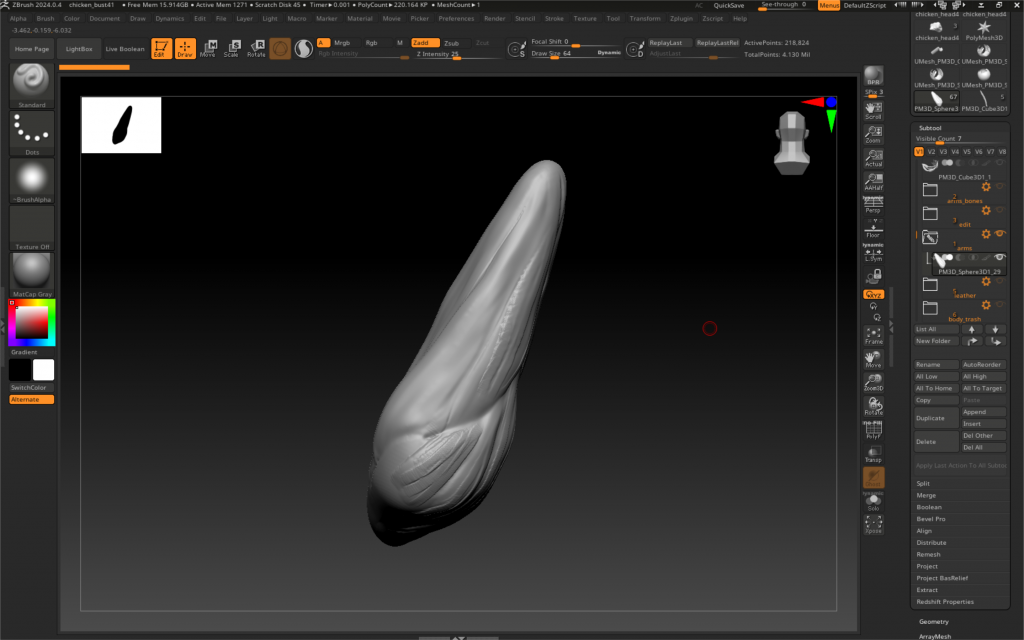
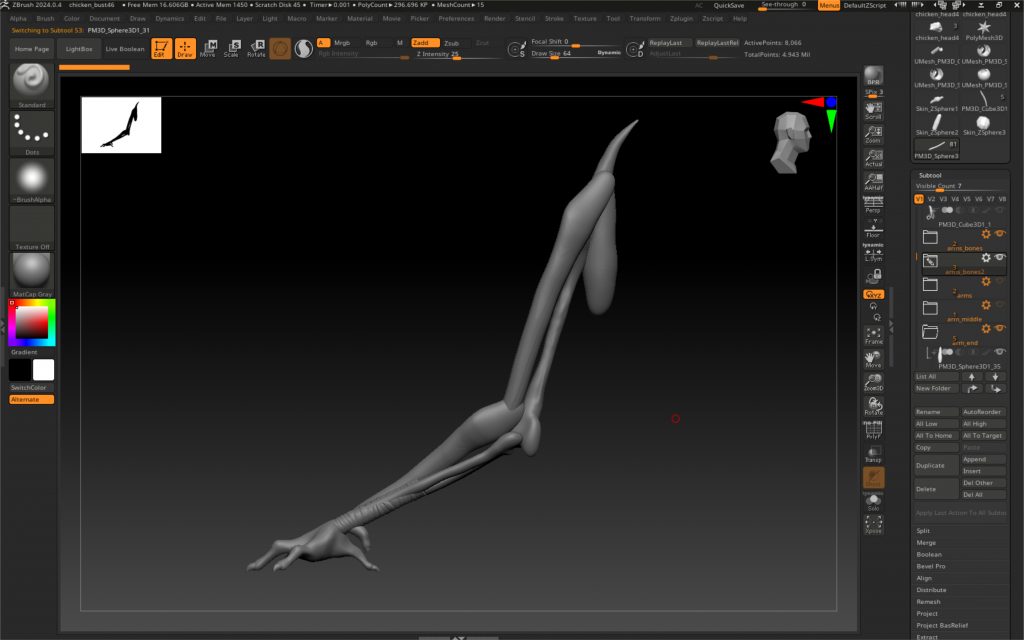
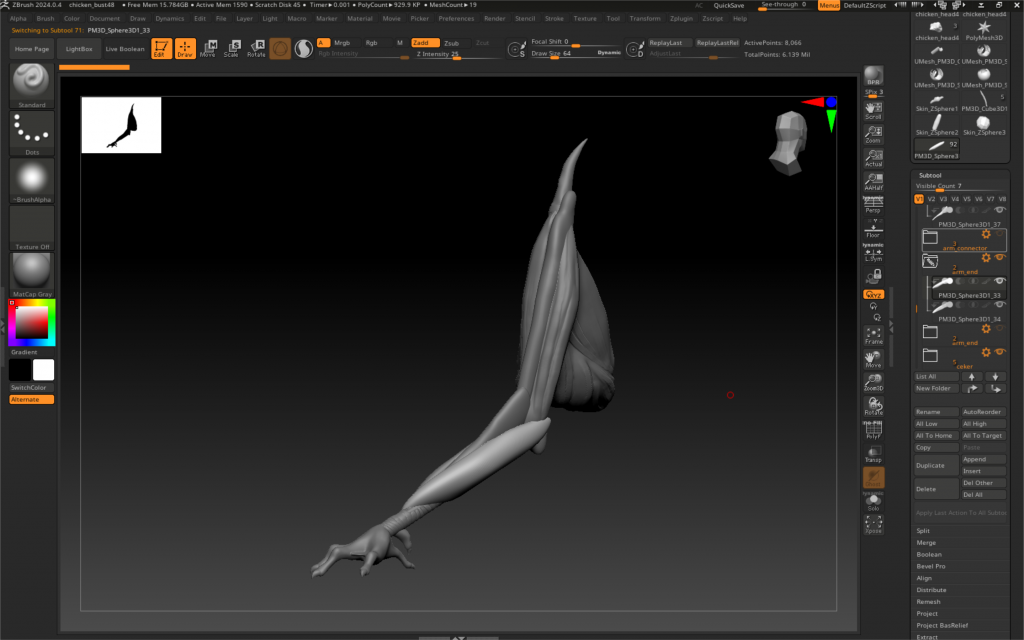
In addition, our tutor also introduced us to another technique to sculpt muscle groups, which was to use and sculpt separate meshes before merging them together. I experimented with this approach and applied it to the muscle connector (the brachioradialis) and lower arm of the chicken model. This method enabled me to create sharper and refined edges of the muscle groups, but it required more time as I had to accurately adjust the mesh’s shape and structure. Afterward, I continued to refine the muscles’ details and sculpt its hands. I chose to create the hand on a separate mesh as I could later duplicate and readjust it for the chicken’s feet.
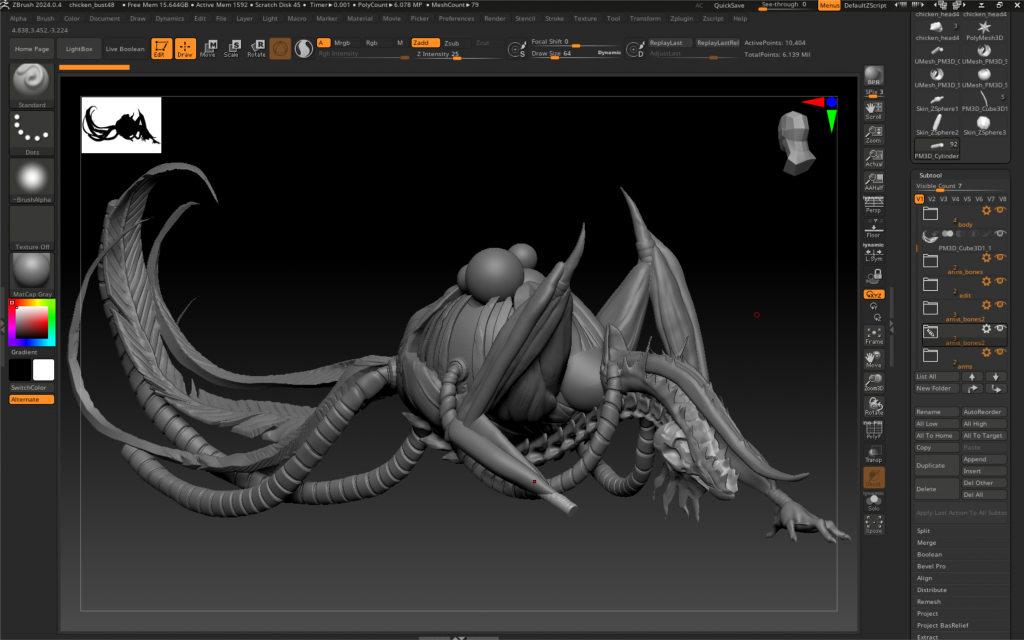
Arm model:

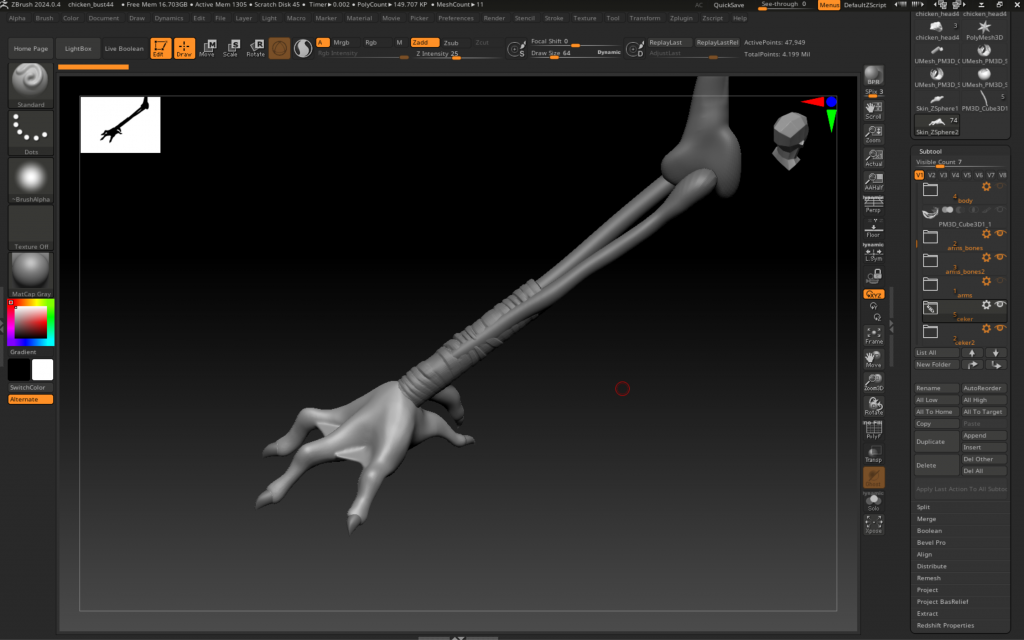
3D model progress: